Crafty Thursday #17: The Double Z Fold

Hello Crafting Friends!

Let’s take a look today at the Double Z Fold card.

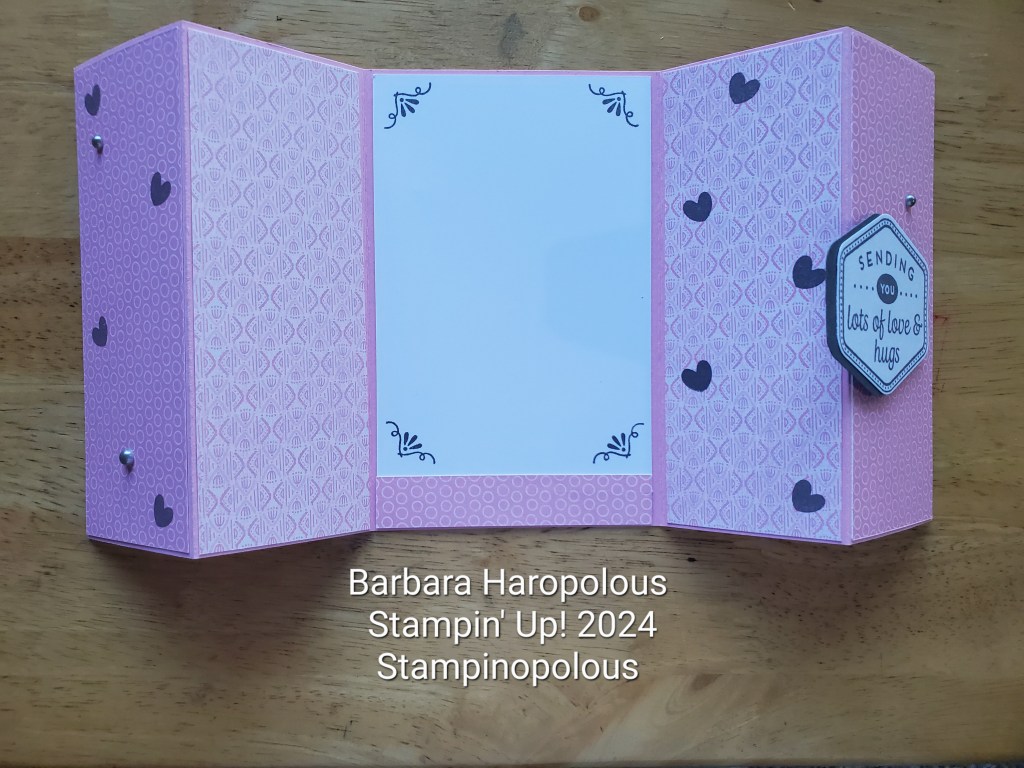
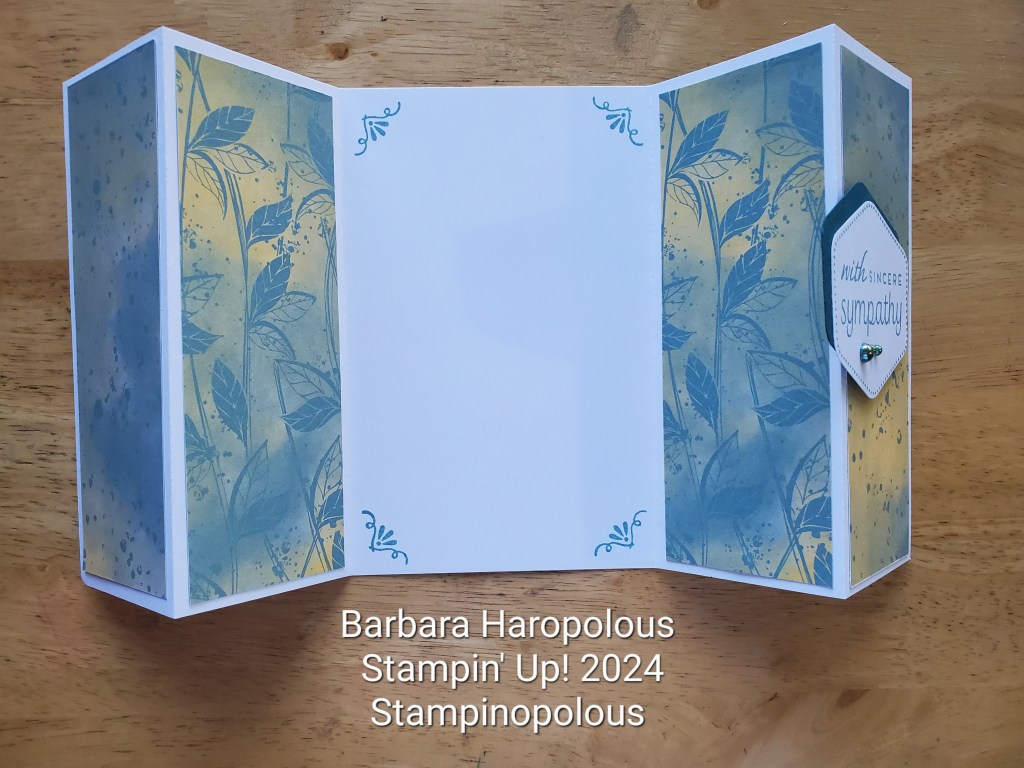
A Double Z Fold will have the folds on both the left and right sides, and the centers can either overlap or meet in the middle. It stands up nicely for display. I will show you an overlap example and a project sheet with all the measurements will be available to newsletter subscribers.

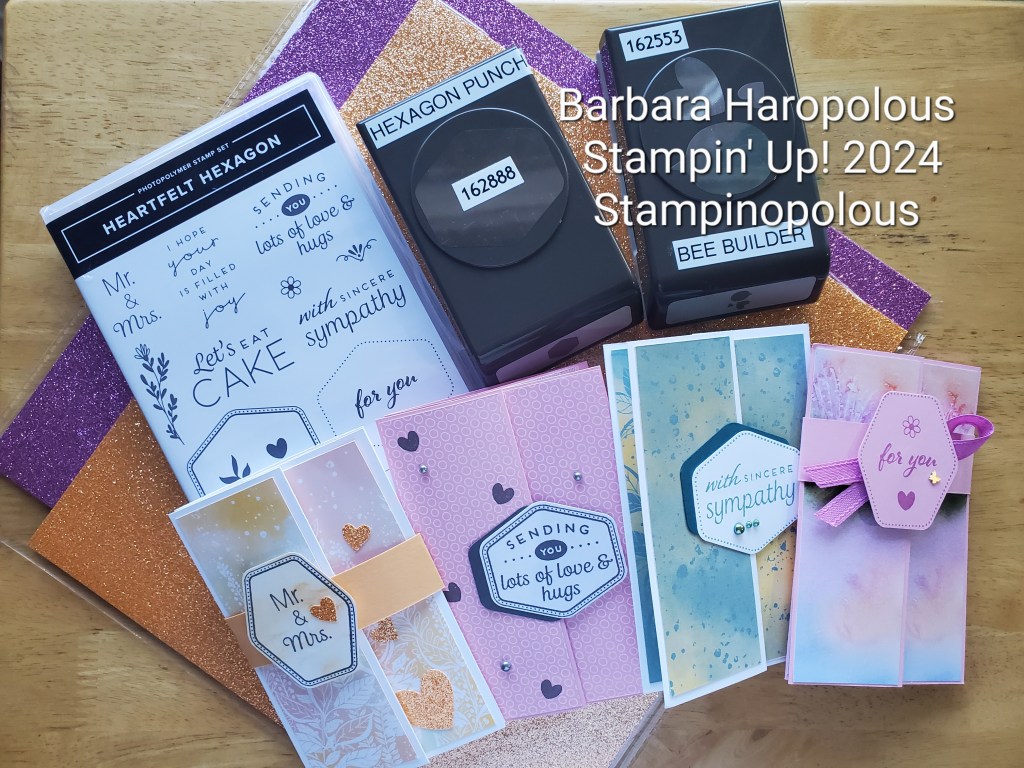
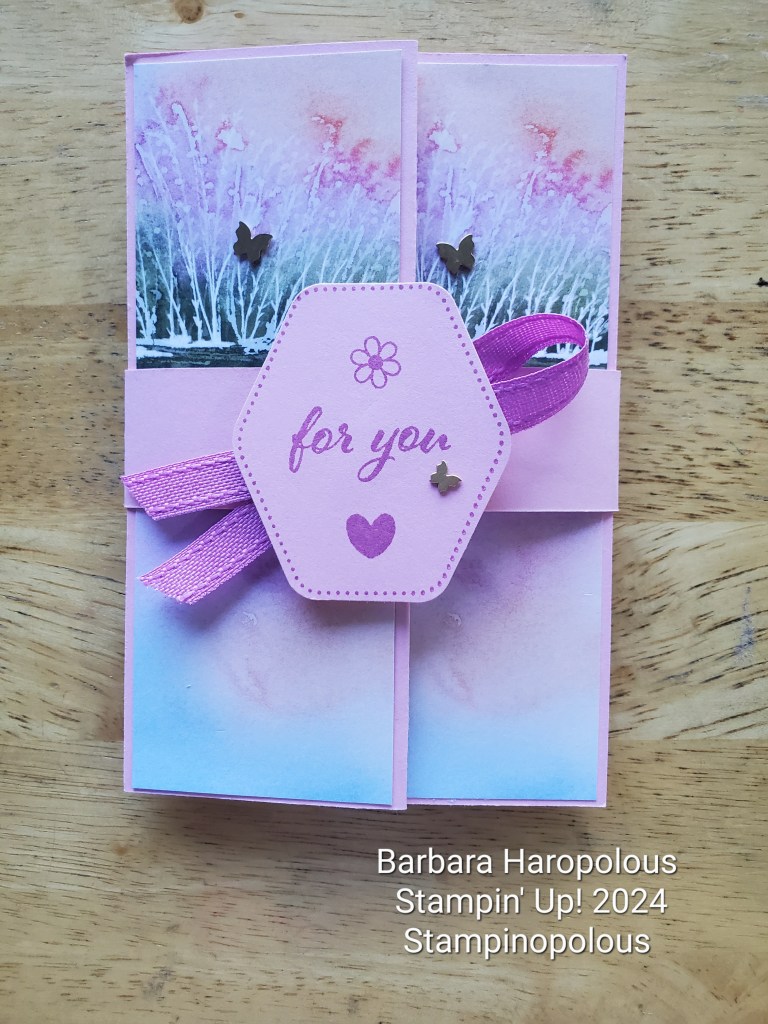
The Overlapping Double Z Fold: I began with a 12 in x 12 in piece of colored card stock. In my examples, I chose the new 2024-2026 In Colors! They are just so bright and pretty; they feel so summer!

For the Designer Series Papers, I used the 2024-2026 In Color (this paper is available in all the Stampin’ Up! color families!) and Thoughtful Journey. I love the watercolor images on the Thoughtful Journey papers; both sides are beautiful. I used a scene, and cut my paper so that it would stretch across both sides of the card. The colors are soft, and the sentiments from the Heartfelt Hexagon stamp set fit perfectly with the peaceful feel of the card. I used the Heartfelt Hexagon punch and stamp set for the focal image on all the cards shown in this post. It’s such a versatile set! The brass butterflies and Petunia Pop ribbon finished the look off nicely.

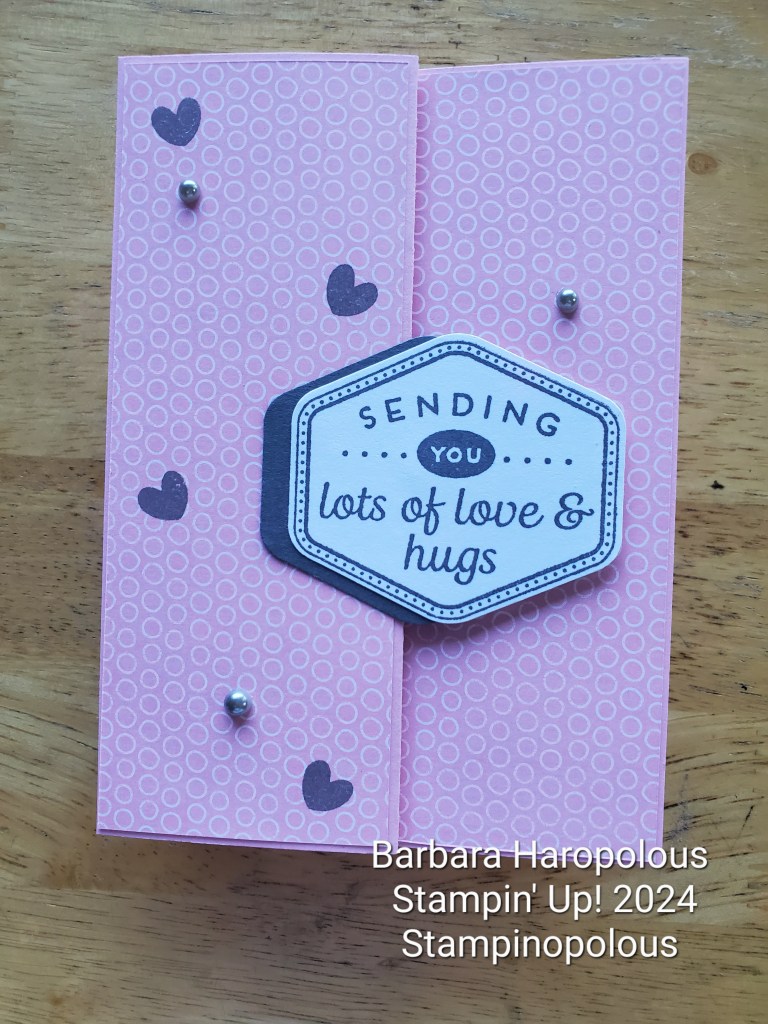
On the other card, I used the same Pretty in Pink card stock, and the 2024-2026 In Color Designer Series Paper. I love anything polka dot, and I thought the Pebbled Path ink really gave a nice contrast; who doesn’t love pink and gray? It’s a classic combo! Pebbled Path is a 2022-2024 In Color, so you want to grab it while it’s still around! I punched a hexagon in Pebbled Path card stock to shadow the focal image, stamped a few curly-doodles on the inside, and added a strip of the DSP along the bottom. I added some playful hearts and finished it off with the Basic Gray and Smoky Slate Pearls. The focal image has dimensionals on the back of the right side only, so the left side slides underneath to help it stay closed.

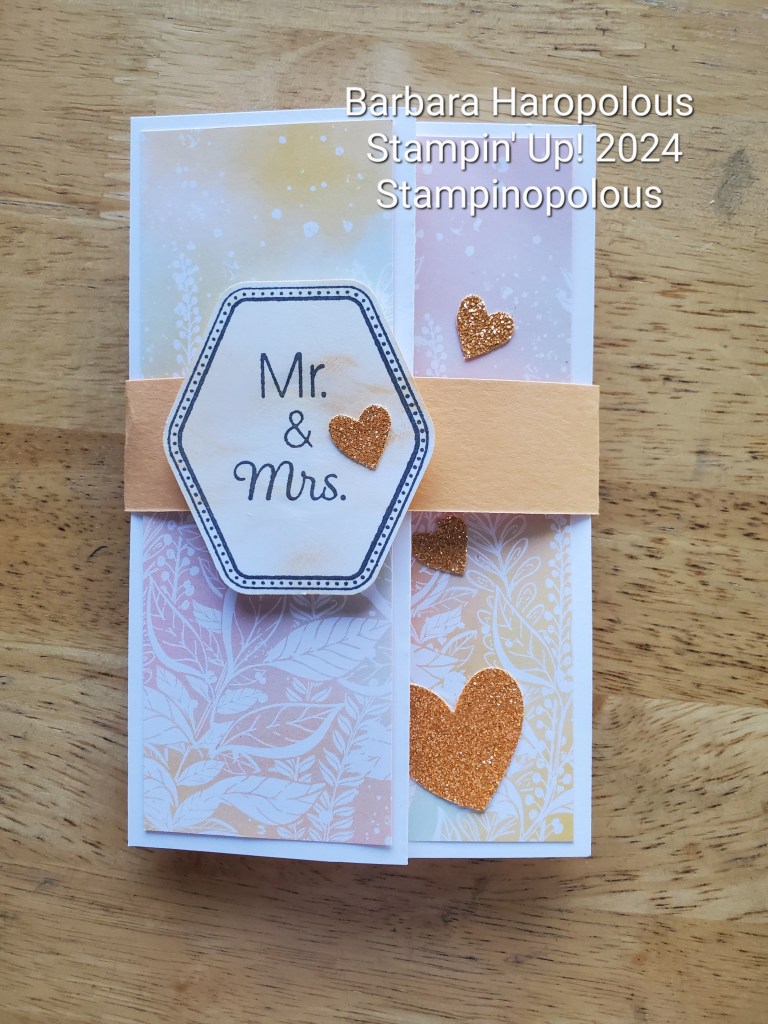
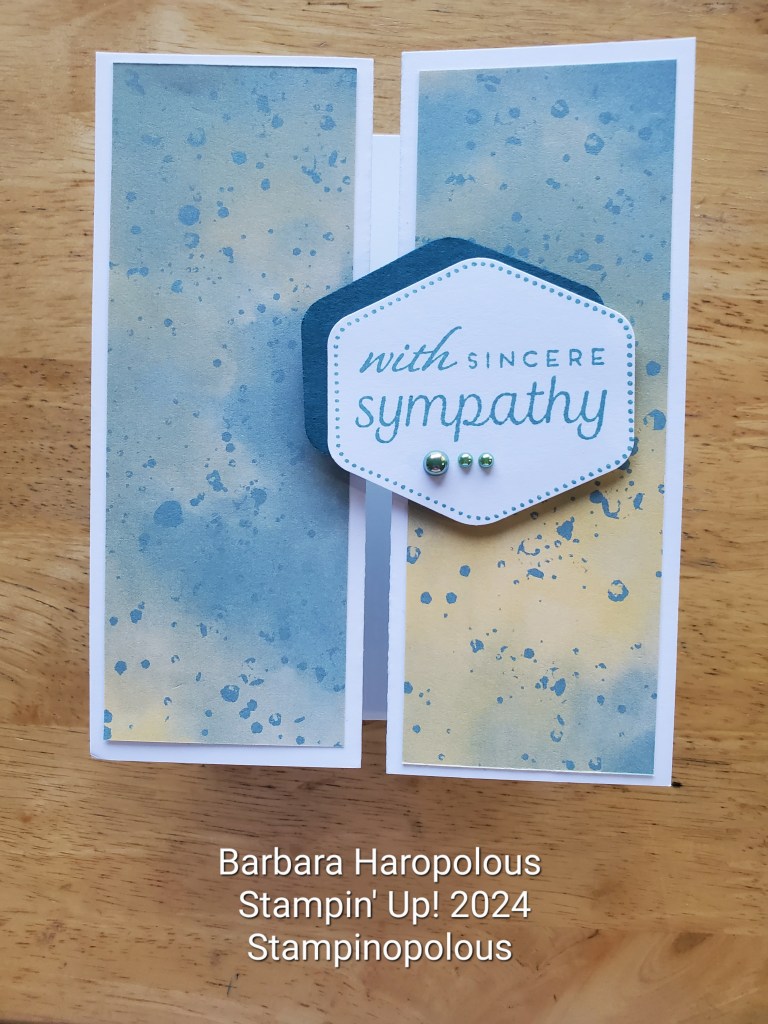
One the second set of cards, I have used some retired Designer Series papers, along with some coordinating new products. For the wedding card, I broke out some of the new 2024-2026 In Color Specialty Glimmer Paper and the Bee Builder punch to add some sparkly hearts! The Pumpkin Pie color worked so well with the colors on the DSP! I also used Pumpkin Pie cardstock on the belly band and some Pumpkin Pie ink blended on the focal point, which made it pop all the more! On the sympathy card (I told you this was a very versatile stamp set!) I added the background hexagon in Pretty Peacock cardstock to offset the Lost Lagoon ink, and kept the embellishments to a minimum. I feel understated is the way to go with a sympathy card.

I hope you enjoyed this look at the Overlapping Double Z Fold card. As you see, there are many occasions to use this card for. Come back next week for another set of cards using the new In Colors and Thoughtful Journey Designer Series Paper. It’ll be SIP cards; Stamps, Ink and Paper! If you shop for any of the products I’ve linked today, please use my Host Code, which is on the sidebar. I appreciate your support!

I plan to do two live demonstrations in June; if you are signed up for my newsletter, you can get all these details right in your inbox!

Thanks for spending some time with me today. Have a wonderful and blessed weekend!

Till next time, Barbara

Crafty Thursday #15: One Sheet Wonder! Featuring the New Online Exclusive Flowering Zinnia Suite


MARCH 2024 HOST CODE: T9DBMCCP

Hello Crafting Friends!

It’s been quite the day around here, with waiting on the big snowstorm to hit Denver. Thankfully, the hubby and I headed out yesterday and got on some staples. I made a nice crock pot full of sauce and meatballs (pictured on my Instagram) before I got started creating my 12 inch x 12 inch One Sheet Wonder. I think it’s a tad unique, if I do say so myself. 😉

I’ve been waiting to get into this suite…as of today, it’s unavailable, but fear not! It WILL be back in stock because it’s a hot seller! (ETA, end of April: Designer Series Paper is currently available, as of this post) The Online Exclusive Flowering Zinnia Suite has everything to make spectacular cards! I’ll show you a few others I made below. Let me show you what I created with this suite!

I don’t know why, but I’m a bit obsessed with Slimline Cards, and the minute I saw this paper, I knew I had to make some! I will link all products used at the end of the post. I’m hoping to get a companion video up on Friday (or later tonight) on my Facebook and You Tube pages to demonstrate exactly how I cut the Designer Series Paper. There’s very little waste, which is what I was aiming for…who wants to waste such gorgeous paper?! I used the sheet featured in the Stampin’ Up! stock photo. It was designed to make cards with little waste. I’ve already seen many beautiful samples online. But, I think I came up with a fun and unique pattern…

I had the dimensions for a normal sized Slimline Card, but I wanted to be able to use as much of the pattern on the sheet as I could. It wasn’t quite high enough to make the 9 inch long version, so I made a 6 1/2 in one! It will still fit in a standard business sized envelope. As you can see, I got to work cutting up the card stock, then I turned to the 12 x 12 Designer Series Paper. I had to use math *shudder* but I survived. The way my OSW goes, you get a total of SIX cards, three of the Short Slimline Cards, as I’m calling them, and 3 standard A2 cards. The cutting is a little unusual, which I why I will try to get that video up. I will explain it as best I can:

~ Start with your 12 x 12 sheet with the patterns to the left and right of the cutting blade. You will be cutting on the white space with this particular paper. 
~ Cut at 5 1/2. You’ll have 2 12 inch long sheets, one at 5 1/2 inch high and the other at 6 1/2 inch high. Set aside the taller one.
~ Cutting with the white space of the12 inch side across the top of the trimmer, slice this piece into 4 inch panels. These will be the front panels of the three A2 cards.
~ Take the taller piece, again with the white space of the 12 inch side across the top of the trimmer. Cut this into 3 1/2 inch panels. There will be one 1 1/2 inch piece left over. Cut this into three 1/2 inch strips. These will be the front panels and decorative strip of the Short Slimline cards.
To cut the A2 card bases:
~ Using 8 1/2 x 11 in card stock, cut in half on the 11 inch side at 5 1/2 inches. Score @4 1/4 inches.
To cut the Short Slimline Cards:
~ Using 8 1/2 x 11 in card stock, on the 11 inch side, cut at 7 1/2 inches.
~ Rotate the card stock and cut at 6 1/2 inches.
~ Rotate back to the 7 1/2 inch side and score @ 3 3/4 inches.
Other supplies needed are:
* Stamp set of choice
* Die cut or punched shape for your focal image
* Coordinating ink
* #6 envelopes for the Short Slimline Cards (link to envelopes.com I am not an affiliat 
You will also need some panels of Basic White for the inside of the cards; 4″ x 5 1/4″ for the A2 cards and 3 1/4″x 6 1/4″ for the Short Slimline Cards.
To assemble the cards:

~ Fold on the score line, “bump” side to the inside. 

Burnish with your bone folder. 
~ Add the inside panel with adhesive of choice (stamp first, if desired)
   ~ A2 card: add the front panel, centering so there is 1/4″ border on either side of panel. You will have to trim off a scant amount from the top or bottom, depending on how you want your image. Attach to all 3 bases and let dry (if using liquid glue) before trimming the extra. 
   ~Short Slimline card: add the front panel, centering for a 1/4″ border around whole panel
~ Add your focal image/sentiment and any embellishments.

I’d love to see your cards using this One Sheet Wonder! You can post them on my Facebook page, in the comments under the corresponding post to this blog entry.

Here are the ones I made using the Flowering Zinnia Designer Series Paper and some using the Perennial Lavender Designer Series Paper

Thank you so much for stopping in! I hope you create some beautiful cards this week and bless others!

Barbara 

*any links provided are for my online store through Stampin’ Up! I earn a commission on any sales from those links.

*Please use the March 2024 Host Code at the top of the post when ordering. This helps me earn products to show you! If your order is above $150 in product, don’t use the code, as you will enjoy your own rewards! 

*If you’re interested in joining Stampin’ Up! as a demonstrator or as a discount shopper, you’ll get $125 worth of products of your choice in your Starter Kit for only $99!. Email me for details!

Products I used in my examples:

Stampin Up! Colored Card stock, Petal Pink 146985 and Garden Green 102584 (Annual Catalog, pg 122-123)

Heartfelt Hexagon Punch 162888 (Jan-Apr 2024 Mini Catalog, pg 12)

Nested Essentials Dies 161597 (Annual Catalog, pg 165)

Perennial Postage stamp set 162598 (Jan- Apr 2024 Mini Catalog, pg 25)

Perennial Lavender 12″ x 12″ Designer Series Paper 162593 (Jan-Apr 2024 Mini Catalog, pg 23, linked above)

Flowering Zinnia 12″ x 12″ Designer Series Paper 163469 (Online Exclusive, linked above)

Sweet Sorbet 1/4″ Bordered Ribbon 162558 (Jan-Apr Mini Catalog, pg 9)

White 3/4″ Frayed Ribbon CLEARANCE ITEM!!! 158138

Adhesive Backed Shiny Sequins 163484 (Online Exclusive)

Brushed Brass Butterflies 158136 (Online Exclusive)

Iridescent Rhinestones Basic Jewels 158130 (Annual Catalog, pg 140)

Classic Stampin’ Pads, Garden Green 147089, Early Espresso 147114, Petal Pink 147108, Flirty Flamingo 147052, Berry Burst 147143 (Annual Catalog, pgs 122-123)