Product Comparison: Black Ink Pads

Hi crafty friends!

Today, I am going to compare two black ink pads.

*Anything written in this post from here on out is my express opinion and nothing more. No one offered me compensation in any way, shape or form. The only LINKS that are my affiliates: the Memento Tuxedo Black ink and the Unbounded Love stamp set.

Black ink is very important for any stamping. You need a crisp outline for coloring that won’t bleed, and you want very clear sentiments. I have used Stampin’ Up! brand inks, Distress Ink and Gina K Designs ink.

To be very honest, I’m disappointed that Stampin’ Up! Doesn’t offer black ink. I love their inks and their trademark pads. However, for black, they carry Memento Tuxedo Black, which is widely available in craft stores and online. I have never liked this ink as much as the Stampin’ Up! brand inks, and I find myself constantly having to reink it (good think I got the reinker!). I don’t know if that has anything to do with living in the Denver, CO area (super dry!) or not. Please comment if you think that’s a possibility!

Editing to add: I mainly use Stampin’ Up! Pebbled Path for my “black” outlines and sentiments. It’s a nice, deep gray and I like the look of it.

I’ve been intrigued lately by Gina K Design’s videos. She has her own line of inks, so I tossed caution to the wind and ordered her Onyx Black ink pad and a cool, round stamp block.

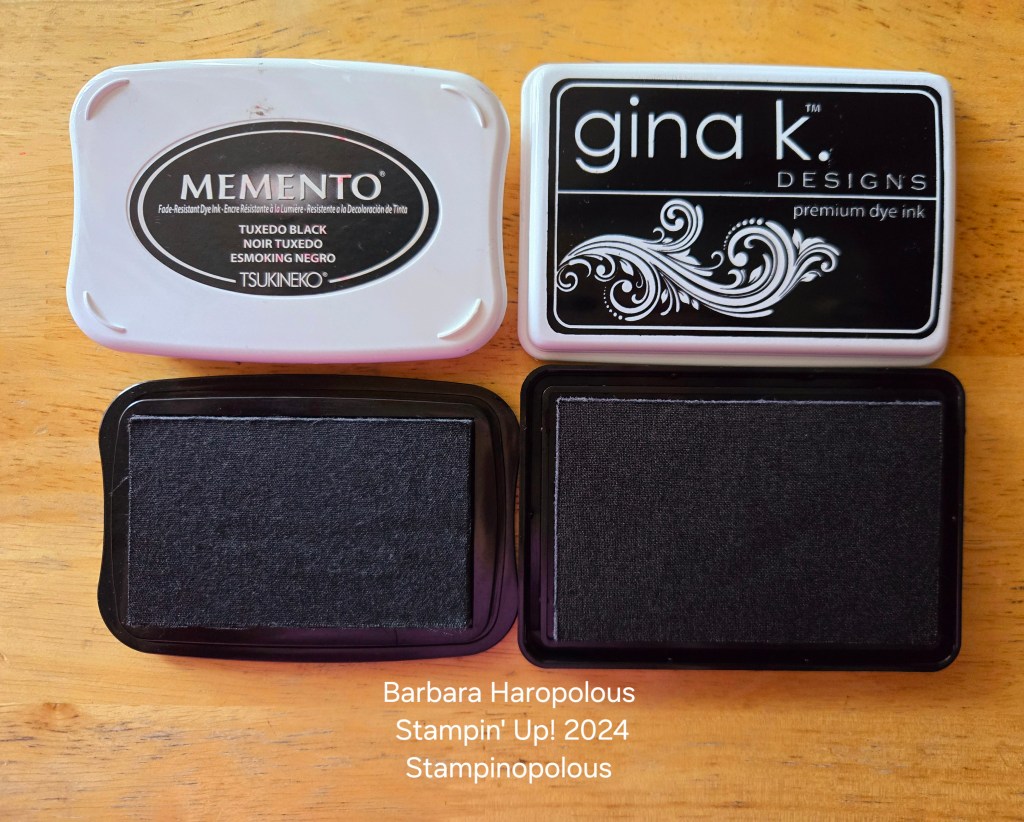
Here’s the side-by-side, which I took with my Samsung Galaxy S24, natural lighting:

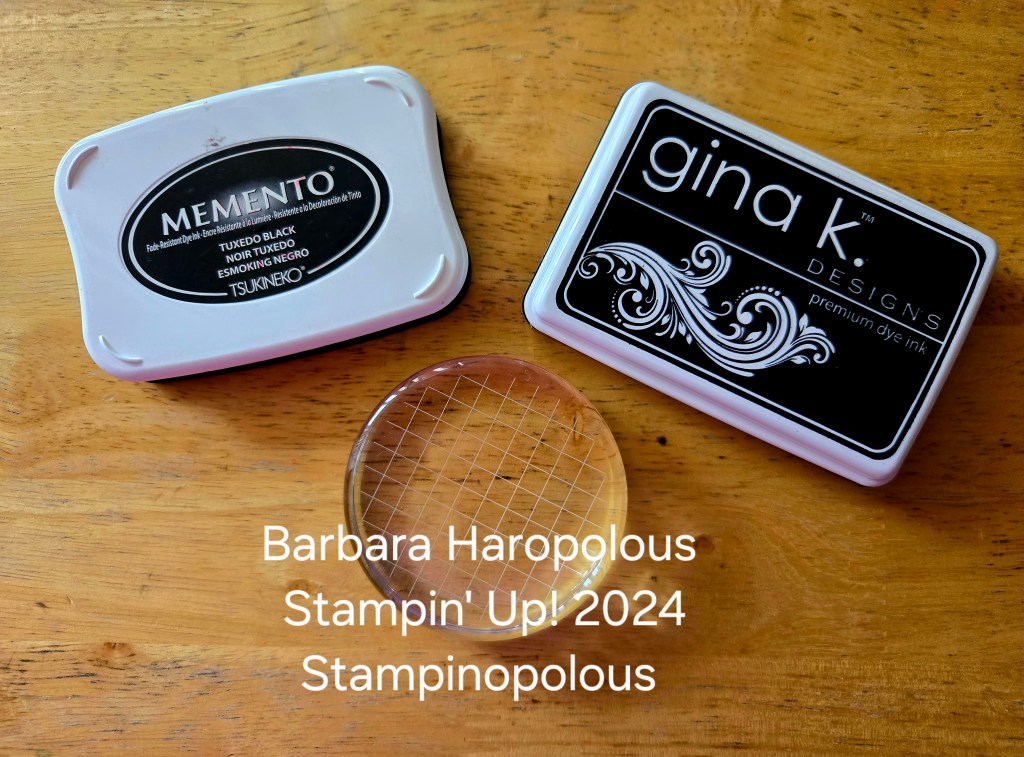
Cases are both easy to open. As you can see, the cases are about the same size, but the Gina K ink pad surface is larger. It’s a full half inch loner and a quarter inch taller. The thickness is the same (about 1/4 inch).

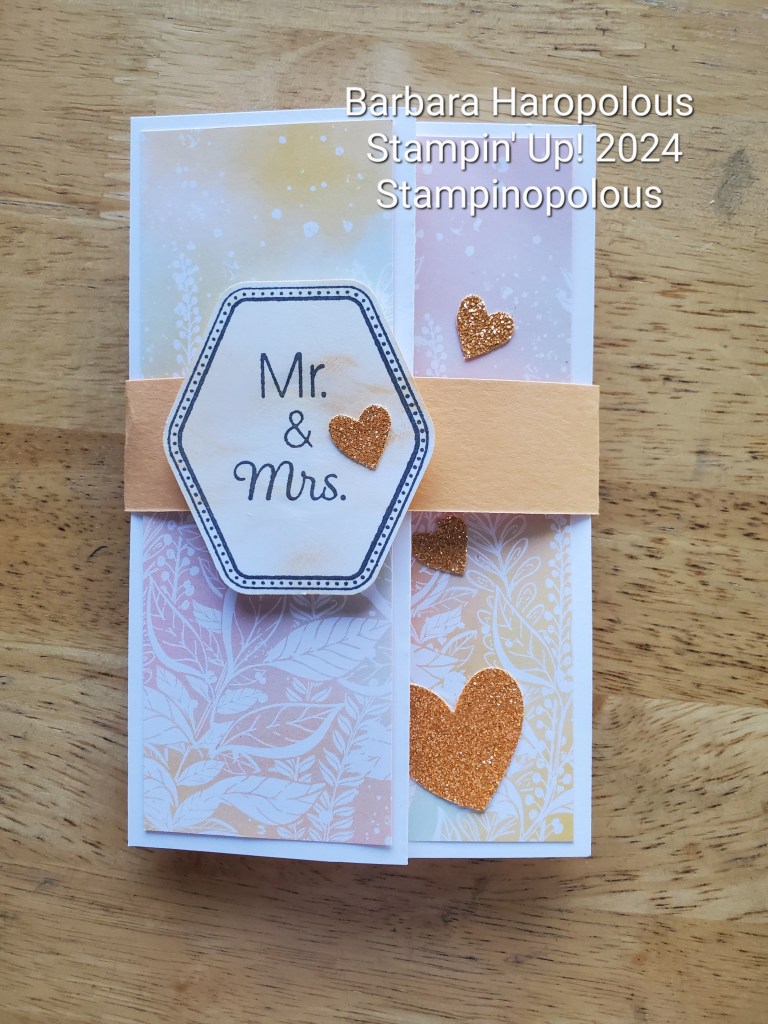
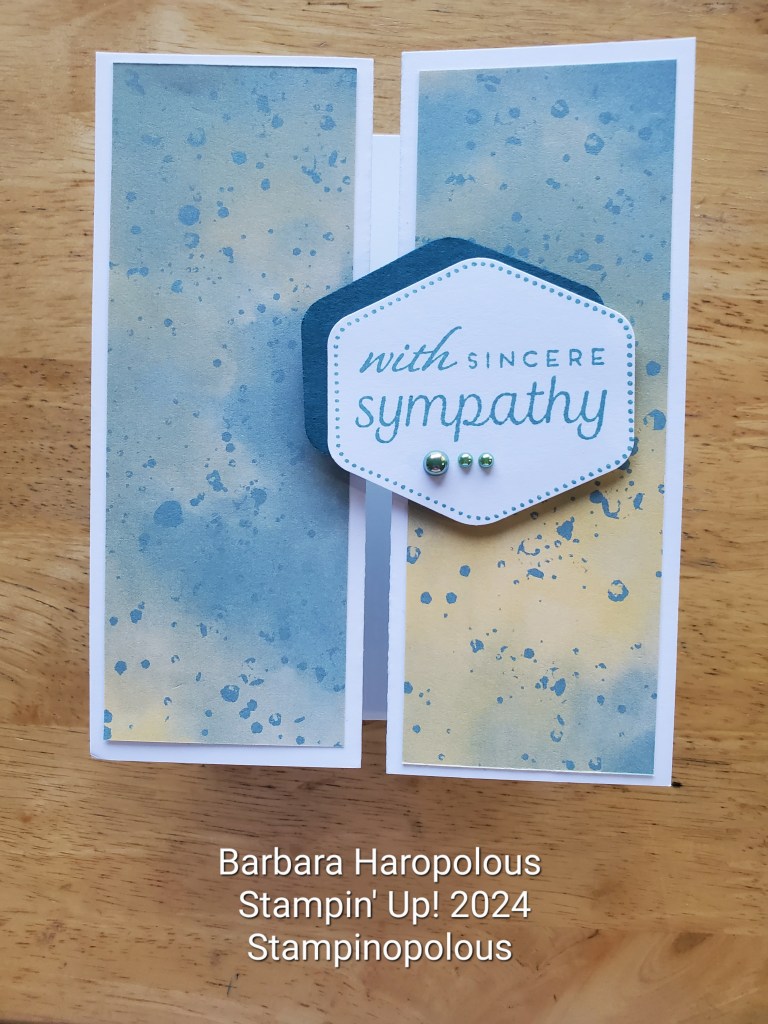
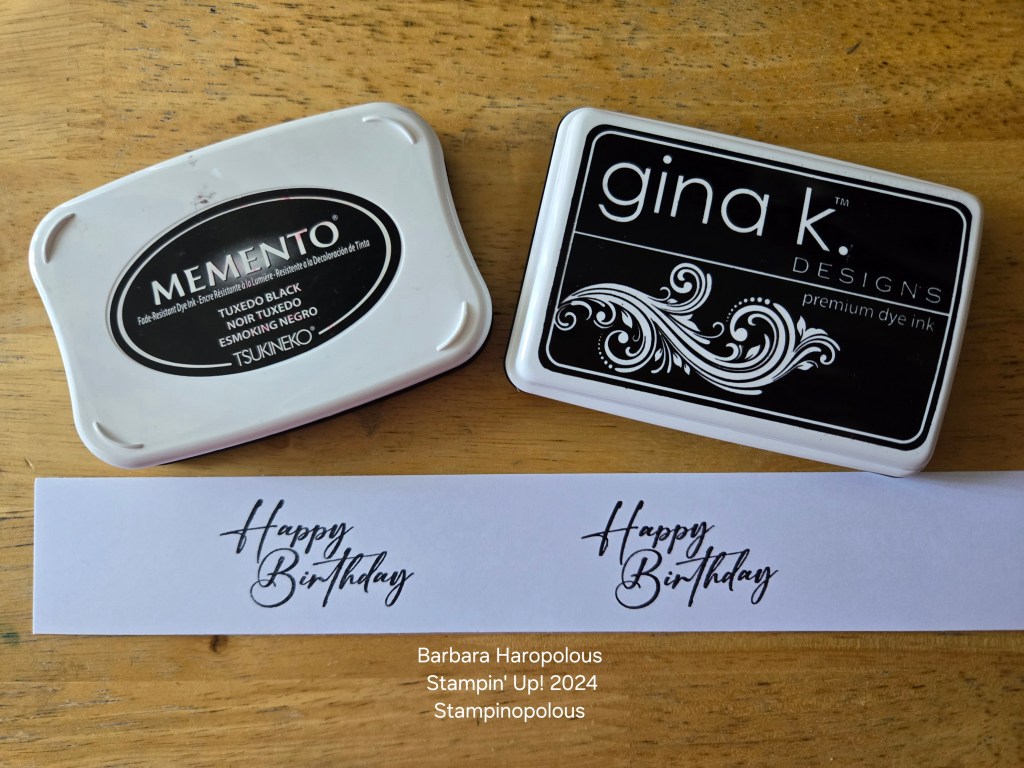
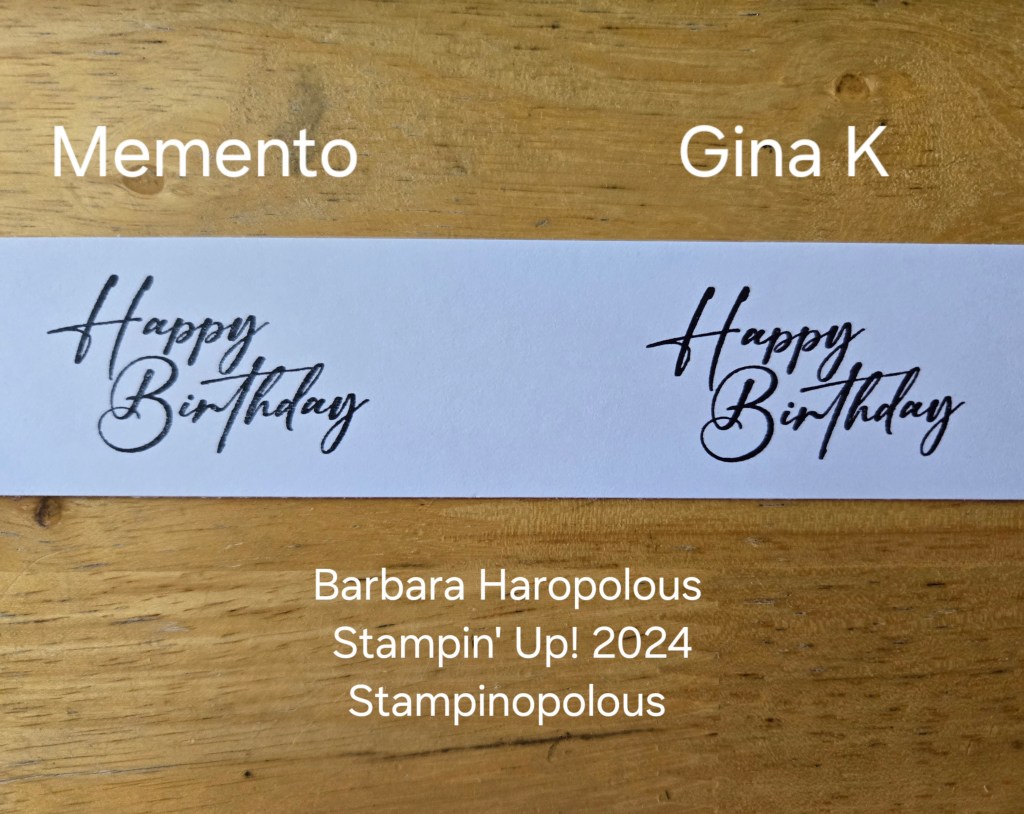
I used a simple Happy Birthday sentiment from the Unbounded Love set, stamped on Stampin’ Up! Basic White card stock. The Memento Tuxedo Black needs a second stamping; the image just doesn’t have the oomph I want with a single stamp. I don’t always want to break out the stamp positioning tool for a simple sentiment and multiple stampings. The Gina K Black Onyx has a wonderful, deep black color with only one stamping. The image is clear and really stands out.

What I loved:

  • The ink is great! My outlines and sentiments are all crisp and clear, and all in one application
  • Cost: at $7.99 for the ink pad
  • Dries fast!
  • Can be used for all techniques
  • Refill available, $5.99

What I would like better:

  • If it had a foam pad
  • If the pad was a bit bigger, but it is bigger than the Memento
  • If it had a nifty all-in-one case

None of those “better” things, however, are deal breakers. I much prefer the Gina K Designs Black Onyx ink over the Memento Tuxedo Black. The Gina K will be my absolute go-to black in for the foreseeable future.

What is your favored black ink? Is there another one I should try out? let me know in the comment section!

Next product comparison: that groovy round stamp block 😉

Thanks for popping in, and, as always. blessings to you!
Barb

Barbara Haropolous, Independent Stampin’ Up! Demonstrator, USA

Crafty Thursday #17: The Double Z Fold

Hello Crafting Friends!

Let’s take a look today at the Double Z Fold card.

A Double Z Fold will have the folds on both the left and right sides, and the centers can either overlap or meet in the middle. It stands up nicely for display. I will show you an overlap example and a project sheet with all the measurements will be available to newsletter subscribers.

The Overlapping Double Z Fold: I began with a 12 in x 12 in piece of colored card stock. In my examples, I chose the new 2024-2026 In Colors! They are just so bright and pretty; they feel so summer!

For the Designer Series Papers, I used the 2024-2026 In Color (this paper is available in all the Stampin’ Up! color families!) and Thoughtful Journey. I love the watercolor images on the Thoughtful Journey papers; both sides are beautiful. I used a scene, and cut my paper so that it would stretch across both sides of the card. The colors are soft, and the sentiments from the Heartfelt Hexagon stamp set fit perfectly with the peaceful feel of the card. I used the Heartfelt Hexagon punch and stamp set for the focal image on all the cards shown in this post. It’s such a versatile set! The brass butterflies and Petunia Pop ribbon finished the look off nicely.

On the other card, I used the same Pretty in Pink card stock, and the 2024-2026 In Color Designer Series Paper. I love anything polka dot, and I thought the Pebbled Path ink really gave a nice contrast; who doesn’t love pink and gray? It’s a classic combo! Pebbled Path is a 2022-2024 In Color, so you want to grab it while it’s still around! I punched a hexagon in Pebbled Path card stock to shadow the focal image, stamped a few curly-doodles on the inside, and added a strip of the DSP along the bottom. I added some playful hearts and finished it off with the Basic Gray and Smoky Slate Pearls. The focal image has dimensionals on the back of the right side only, so the left side slides underneath to help it stay closed.

One the second set of cards, I have used some retired Designer Series papers, along with some coordinating new products. For the wedding card, I broke out some of the new 2024-2026 In Color Specialty Glimmer Paper and the Bee Builder punch to add some sparkly hearts! The Pumpkin Pie color worked so well with the colors on the DSP! I also used Pumpkin Pie cardstock on the belly band and some Pumpkin Pie ink blended on the focal point, which made it pop all the more! On the sympathy card (I told you this was a very versatile stamp set!) I added the background hexagon in Pretty Peacock cardstock to offset the Lost Lagoon ink, and kept the embellishments to a minimum. I feel understated is the way to go with a sympathy card.

I hope you enjoyed this look at the Overlapping Double Z Fold card. As you see, there are many occasions to use this card for. Come back next week for another set of cards using the new In Colors and Thoughtful Journey Designer Series Paper. It’ll be SIP cards; Stamps, Ink and Paper! If you shop for any of the products I’ve linked today, please use my Host Code, which is on the sidebar. I appreciate your support!

I plan to do two live demonstrations in June; if you are signed up for my newsletter, you can get all these details right in your inbox!

Thanks for spending some time with me today. Have a wonderful and blessed weekend!

Till next time, Barbara

Stampin’ Up! June 2024 Promotion!

BIG NEWS!!!

💥 June 5 – 30, Stampin’ Up! is having a HUGE “Bundle” promotion! There are so many great bundles in the new catalog!

💥 Get an additional 10% discount on stamp and die bundles only. Not applicable on suites or stamp and punch bundles. Stamp and die bundles are normally 10% off, and in June you get even MORE off!

💥 Save 10% on BOTH the Stampin’ Cut & Emboss Machine and the Mini Stampin’ Cut & Emboss Machine (White or Boho Blue)!!! THIS is a great deal! The machine comes with all plates and is ready to go! You only need to attach the crank handle and you can die cut and emboss to your heart’s delight!

💥 The 10% discount will automatically apply. There’s no special codes needed for the promo! Please, though, do use my June Host Code, which will be available on June 1!

💥 Get your shopping list ready for June 5! Shop early, as products go FAST, FAST, FAST!

👉 Please note: Close To My Heart products are not included in this sale

#creating #createandblessothers #stampinopolous #stampinup #cards #cardmaking #papercrafts #salesalesale

Paper Pumpkin April 2024 Unboxing

Companion video on You Tube

Hello, hello!

I filmed a live unboxing on Friday of the April 2024 Paper Pumpkin kit, Delicate Wings, which as you can imagine, if full of glittering, gold foiled butterflies! It was so much fun to open up the kit live with everyone!

When you purchase a Paper Pumpkin subscription ($25 per month) your kit arrives in a sturdy orange box that is shrink wrapped. When you open it up, everything you need to create the three card projects inside is all included. You can make three of each design, which gives you nine total cards. You cannot purchase nine cards of this quality from the store!

The kits are a great option for someone who is new to paper crafting and card making, who would like to dip their toes in. They are terrific for those of you who are on a limited budget or have limited space to store crafting supplies. They are also fun for the kids or grandkids to create cards with! You can pause your subscription at any time with no penalty and pick up whenever you would like to.

The first kit you purchase will include a clear acrylic block for your stamp set…don’t lose it! 😉 All the Paper Pumpkin stamp sets will use this sized block. You can purchase extras from Stampin’ Up! or purchase a sized D block. The size difference between the blocks is about 1/4 inch in the thickness, and the Stampin’ Up! block has the rounded comfort edges. (SU block shown is a different size) I have extra Paper Pumpkin blocks to use at my in-person card classes.

This kit didn’t include any embellishments because the cards themselves are so amazing! The foiled backgrounds on the card bases are amazing and really stand out with the Basic Grey and Lost Lagoon backgrounds. Here are the 3 samples I put together in the video. I added the gold dots to the butterfly with embellishments that I had.

I hope you enjoy the video! Please subscribe if you’d like to see more.

Till next time, God Bless and happy crafting!

Barbara

Saturday Afternoon Crafting #1

Hello Crafty Crew! 

So sorry about my Thursday post…I’m having a hard time getting a short video made for the heat embossing technique to add to my post. I will get to it, I promise!
In the mean time, I had a nice afternoon working on some cards to share with you. The original design is from my great team leader, Stamp With Lorraine’s You Tube page
All products used are linked under the pictures.
 
Smoky Slate card base, 8 1/2 in x 5 1/2 in., score @ 4 1/4 in
Crumb Cake embossed strip, 1 in x 4 in, sentiment strip approx 1/4 in x 3 in
Early Espresso Ink Pad (used on all 3 cards)
Nature’s Sweetness 12 in x 12 in Designer Series Paper, 3 in x 5 1/2 in
Floral image cut from Nature’s Sweetness DSP
Softly Said stamp set (used on all 3 cards)
Basics 3D Embossing Folders, set of 3 (used on all 3 cards)
Blooming Pearls embellishments
Smoky Slate and Crumb Cake Card Stock available in Neutrals Card Stock Pack
(used on all 3 cards)
Crumb Cake card base, 8 1/2 in x 5 1/2 in, scored @ 4 1/4 in and embosssed strip, 1 in x 4 in
Hello Irresistible 6 in x 6 in Designer Series Paper, 3 in x 5 1/2 in and a small coordinating piece, 2 in x 2 1/2 in
Flowers cut from Hello Irresistible DSP
 Paper Pumpkin Leaf Die 
Blooming Pearls embellishment
Crumb Cake card base, 8 1/2 in x 5 1/2 in, scored @ 4 1/4 in, embossed strip 1 in x 4 in
Trusty Toolbox Designer Series Paper. a Sale-A-Bration $50 level reward choice
Hexagon embellishments, retired

I also made 2 slim line cards, which I think will be the subject of another post 😉 Here’s a shot of all of them together


It’s the final few weeks (through Feb 29) of Sale-A-Bration, and Stampin’ Up! added some other fun rewards! If you have a wish list of $50 in product, you qualify for some great choices! If you have a wish list of $100 or more, you have even MORE choices! If you decide to shop, please use my February Host Code*, below 🠟

I appreciate you coming by, reading, commenting, etc. Don’t forget to follow this blog and my other social media, all under Stampinopolous. 
Thanks!
Blessings,
Barb 
FEBRUARY 2024 HOST CODE: YH7YXNSK

*What is a Host Code?
A Host Code is how the “host” of the stamp class/demonstration earns products from purchases. When you shop for products I am demonstrating, I act as the host. By using the Host Code (you add it as you order) you help me earn products.
YOU can earn products, too, if you’d like to host a demonstration! YES, you can do a virtual demonstration! Message me for details!
If your order is $150 in product, you don’t add the host code, as you will earn your own Stampin’ Rewards!
Stampin’ Up! LOVES their customers and their demonstrators…and who doesn’t love free stuff! 😉

In the Word Wednesday #11: Using Stamps in Your Faith Journal and Planner

Happy Wednesday, friends! I’m so glad you came for a visit. Pour some tea or coffee, pull out your faith journal/planner and some supplies and let’s get creative!

Wait a second…what does stamping have to do with worship?

 We worship the CREATOR of the universe; the sun, moon and stars, mountains, valleys, birds, butterflies, rivers, lakes, oceans, you get the picture. Why not incorporate creativity into your journaling? 

I don’t always “feel” like it; sometimes I just want to write, write, write. But there are times when some pretty stamps or washi tape (and let’s not forget stickers…but that’s a whole different rabbit hole!) inspire some praise, or worship can inspire the decor! 

You don’t need to run out and buy anything; chances are if you read this blog, you already have stamps, ink and paper. 😀 Why not use them for more than card making?

I wanted something a bit different this year for my planner, and I decided to once again try out a disc-bound system. My friend Kristi of LifeinLine123 creates really nice, functional pages that you can print and use in your planners or journal. All her info is in the link, she’s passionate about incorporating faith into planning, wellness, and all of life! Here are a few shots of my February spread and weekly pages. Nothing too fancy, just reminders to trust God as I make plans, write appointments, etc.I also have a spiral notebook that I use for worship and prayer. 

Who doesn’t love Washi tape? I’m pretty low on it, but I’m NOT low on ink and stamps!

I used the Easter Lilies and Courage and Faith stamp sets on the February monthly spread. 🠞

I love me a good Bible verse set! Encouraging words for the month are always good to review. I love the background stamps, too, to add just a bit of interest to the pages. If you use Kristi’s or any printable pages, you don’t have to disc-bind your journals. You can 3 hole punch, put them in plastic sleeves, the sky is the limit! If you have a comb-binder, you can do that, too. I may splurge on some better quality printer paper as I go forward. 

🠜Here I’ll use the tiny heart from the Sending Love set to mark off my daily goal boxes..SO CUTE!!! 💛 I think that tiny heart is my very favorite stamp. Do you have a favorite stamp or set? Break it out and use it for more than cards! 

I’ll share my March spread at the end of February…it’s birthday month 🎆and I’ll try adding some fun papers to my monthly and weekly spreads, as well as some hand made dividers using a retired color card stock and some overstock of Sale-A-Bration DSP.

I hope this inspires you to get out some ink and stamps (and, maybe some washi 😉 ) and do a little creative stamping in your journals or planners.

Till next week, stay creative and prayerful!
Blessings

Barbara 🌻

Crafty Thursday #12 Extra: New catalog and Sale-A-Bration!

*January 2024 Host Code: M6C34D2G

Today is THE day! Let’s talk Sale-A-Bration and the NEW Mini Catalog! There’s so many fun, new products and fun new products to get for FREE with Sale-A-Bration going on. 

I am so excited to show you more projects with all the great new products. I have some (not all! 😉) and the ideas are endless; I’m planning on making a planner for the year, using  some of the ab-so-lutely beautiful new papers. 

Sale-A-Bration is the biggest promotion of the year, and it runs Jan 4-Feb 29, 2024. There are 2 tiers of free gifts you can earn from shopping:

Tier 1: for every $50 you spend in product, you earn free product. There are lovely papers and stamps sets that are only available during SAB. That’s for every $50 you spend, you can pick a free, exclusive product!

Tier 2: For every $100 you spend in product, you can earn a different choice of product. Again, lovely papers, stamps sets with dies, all exclusive to SAB. You can also combine, and pick a $100 freebie and a $50 if you spend $150, or 3 $50 freebies. There’s really no downside!

If you’re interested in joining as a demonstrator during SAB, you get $125 worth of products as your starter kit (YOUR choice, there are no pre-set kits) PLUS the new Glass Mat studio all for $99. 

This is a hot, hot item, so IF you’re considering choosing this as a join option, hurry! The generous glass mat (17″x14″) comes with a cleaning cloth and a silicone multiuse mat that you can use to mix inks, hold your Stampin’ Spots inks and so much more. This is a great offer and I’m a little envious 

If you saw my post from last week, I featured the Rock and Roll Suite from the new Mini Catalog, which is available today! Products in the new mini are available Jan 4-April 30, 2024. Some of them, like the Perennial Lavender Suite, is going to go fast! I used some of them on my Dozen Notecards in today’s regular post. I love the Postage Stamp dies that are part of the suite; they make such unique cards.

The Bee Mine Suite is going to be the focus of my February card kit and demonstration. The kit will include supplies to make 3 cards, including embellishments and an instruction sheet. I will let you know in next week’s post about the kit’s availability and price.

I hope you decide to try some great products, make some cards and spread joy! I’d love to help you in your crafty journey. Contact me for any help or information you need: stampinopolous@gmail.com

*My January 2024 Host Code is M6C34D2G. Thank you for using it when you order. If your order is over $150 in product, don’t use my code, you will be able to enjoy your own rewards benefits! If you order $50 or more in product, you will receive a thank you gift from me personally.

Crafty Thursday #11 The Rock and Roll Suite Sneak Preview!

Good morning, crafty friends! 

Today’s cards feature a preview of  the Rock and Roll Suite, and man, oh, man! This is a fun group of products! This suite will be available for purchase January 4th – April 30th, 2024 from the new Mini Catalog. The December 2023-January 2024 Host Code is M6C34D2G *

Just take a look at all those fun things! The 12×12 Designer Series papers are all black and white themed, so you can use them for many different occasions, not just Rock and Roll birthday greetings!  The stamp set is red rubber, and there are coordinating dies with a few extras thrown in. I love the big guitar pick, and with the right DSP, it looks perfect! 

What suite would be complete without some embellishments? The stars and lightning bolts really complete your cards. On a few of the samples I also used the Gold Faceted Sequins, since the larger ones looked like guitar picks. 

To make my sample cards, I used a simple layout that shows both sides of the DSP. I will put the measurements at the end of the post. I created one simple card that you can create with minimal supplies, then I made a few stepped up versions with die cuts and embossing folders. You do not need a lot of tools to make beautiful cards…but they are fun to use!

For the simpler card, I used a 2 3/8 in circle punch for the focal point, stamped in black on white card stock. The decorate strip on the left side of the card is a coordinating piece of DSP. All of these patterns work well together as they are all black and white.

The only embellishments on the front are a few of the Gold Faceted Sequins. Inside I used the “Thanks for Being an Icon” stamp from the set, that sentiment just makes me smile! Nothing fancy, just some black ink and white inside, on a black card base. I wanted  to emphasize “simplicity” with the layout and supplies

For the stepped up versions, I used some colored card stock, embossing folders and dies. The strips on the left have been embossed, and the focal points all use different die cuts, some that are in the matching set, and others are from the Nested Essentials and Stylish Shapes die sets. Some of the cards have a few points of color using the handy sponge daubers to create highlighted areas on the DSP or the inside sentiment. A few of the focal points have been heat embossed. I used Wink of Stella  on some of the cards to highlights the records on the DSP for a bit of shine! 

Today (Dec 28) is my brother’s birthday, and his card has ALL the fun stuff on it, and was also a jumbo sized card. 

I used  a similar layout as the featured cards, as well as the matching die cuts, and some markers to color the guitar to match his. You can also see the lightning bolt and star embellishments, as well as a few of the star die cuts that are extras in the set. The banner is from the Nested Essentials die set. Inside was more or the same, I added the large die cut guitar pick and microphone, more lightning bolts…It was a pretty full card! He said it was “the best birthday card ever,” and that makes me a very happy card making sister! 😁 

Schnibby, if you read this, Happy, Happy! 

Here are the measurements for the featured cards, which fit in a regular, A2 envelope.

Card base: 5 1/2 in x 6 in, scored at 4 1/4 in

DSP front: 3 in x 5 1/2 in

Decorative strip on front: 1 in x 5 1/4

                                                                Inside blank: 4 in x 5 1/4 in

I’d love to know if you made this card or used this template with other colors and Designer Series paper.

 You can read about singing a new song to the Lord at this gotquestions link.

Thanks for taking some time to spend with me today. Have a wonderful and blessed New Year and I’ll see you again in 2024! 

Blessings,
Barb

*My December 2023-January 2024 Host Code is M6C34D2G. Thank you for using it when you order. If your order is over $150 in product, don’t use my code, you will be able to enjoy your own rewards benefits! If you order $50 or more in product, you will receive a thank you gift from me personally.

Crafty Thursday #10: Bookmarks!

 Who doesn’t love a bookmark? 

Bookmarks are a quick and easy project and great for gifting; they can be tucked into a card, hand delivered or tucked into a book for gifting. I’ve been making them and giving them to my wonderful Bible study friends, and a few ladies here at my complex who I meet with some days for crafting. 

They are also very, very versatile, for many occasions. Mix your stamp sets and papers, and you create unique gifts. If you use plain card stock, you can shadow stamp on that, too, for a completely different look. So many options! These are also pretty great for using odd scraps or retired DSP that you may not think you have a purpose for. 

The measurements are so simple, it doesn’t require a whole instruction sheet 😁

Supplies needed:

Stamp set

Card stock or Designer Series Paper

White or vanilla card stock

Glue, or adhesive of choice

Hole punch and ribbon

Base for your bookmark is 2 inches wide by 6 inches long. Cut this from colored card stock or any designer series paper.

Cut your white or vanilla card stock for center 1.5 inches by 6 inches. You can make it a bit shorter if you want a border on the top and bottom.

Decorate your center piece with your stamp set of choice.

Glue your pieces together. I like glue for this, so it will stand up to use. If you use wet glue, let dry completely before next step.

Punch hole at top, and add your ribbon. This is, of course, optional. One of my study friends immediately takes the ribbon off of her bookmark.

Here are some of my recent creations; a friend ordered 3 dozen!

I hope this gives you an idea for last minute gifts or small ways to bless others. After all, isn’t that what crafting is all about?

I will be “off” next week as we have a few appointments and, of course, last minute Christmas shopping!

I hope that you all have the most wonderful of holidays, and come back December 28th for a “rocking” fun birthday card! 

Glory to the new born King!

Blessings, Barb