Hello and welcome to Crafty Thursday!
I hope you had a wonderful and creative week. I happened to get a Happy Mail delivery today from Stampin’ Up! so that helped get my creative mood flowing. So many fun, fun things!
I am completely geeking out over those A-Dorable Ink Spots! They are 1 inch square and come in the classic colors like Real Red, Gorgeous Grape, Daffodil Delight, etc. They also have an option to purchase blank Ink Spots and the refill inks, so you can create your own set. It’s a great and economical way to build a nice ink collection.
I needed to replenish my Dimensionals, grabbed a few Stamp Blocks, embossing powders and VersaMark Ink for embossing and tone-on-tone stamping.
After thoroughly examining all my new supplies, I got down to it.
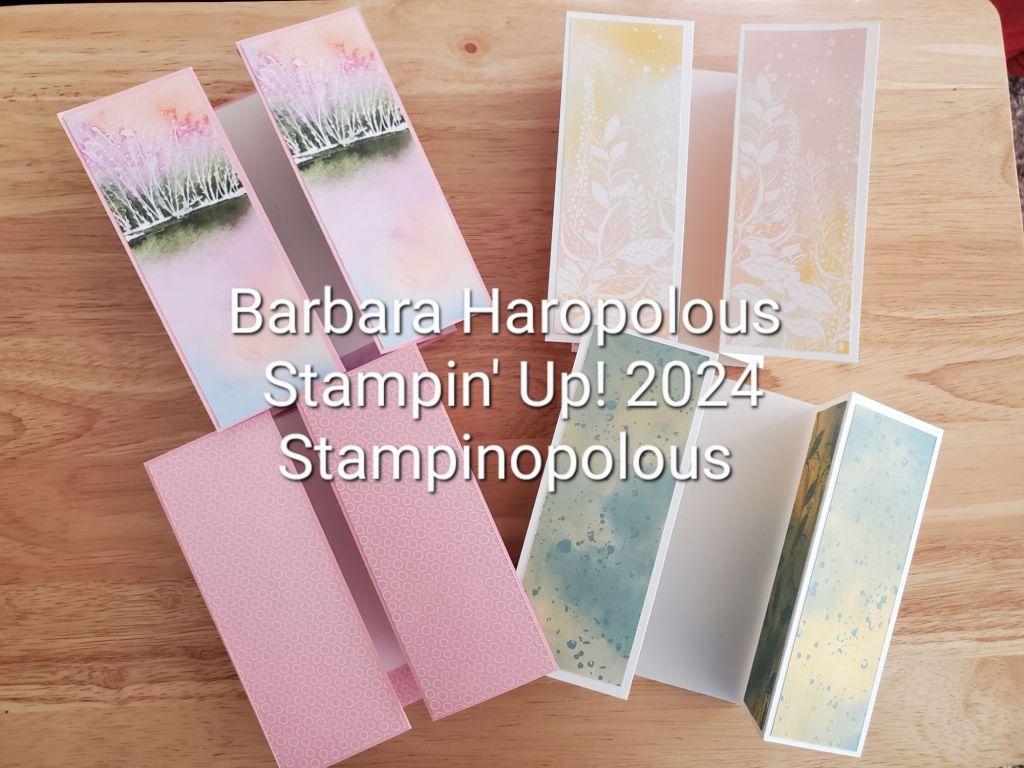
 The card I’m featuring today is a variation of the Gift Card Pocket Fold. It’s a nice, easy one to make if you’re just beginning your card making, or if you have minimal supplies on hand. It’s not a “standard” card size, which is okay since I’m not going to be mailing it. I do believe it will fit in a large envelope. You can find many, many printable lists of standard card sizes online. This one is on Pinterest. I used an odd piece of black card stock that I had on hand, and it folded up to a nice almost 6 in x 3 1/2 in card.
I used the new stamp set, Stamped With Love, which has the adorable letter and pen. The mailbox is fun, too and it has some nice, simple sentiments included. “I Like You” and “Love You Always” has a pretty script font, and sounds like something you’d actually write. I was also waiting for the Bright and Beautiful paper, just look at all those fabulous patterns! I wanted to make a dozen more cards with it just because it’s so darn fun.
The bright colors really popped against the black. I just love that adorable envelope and pen! You can use so many of other sentiments in there, but I used one from the set. After I stamped that, I added the red heart (possibly the smallest stamp ever created) and colored the pen with alcohol markers. Then I fussy cut around it, added dimensionals, and boom, the front was complete. It’s nice to have a quick and clean look, especially with the bold DSP
Inside, I added some fun stripes to the pocket, which is the opposite side of the paper. There are so many GREAT patterns with this set, there are so many combinations you can use.
I love the humor of the inside sentiment, “so you get a card.” I added another tiny heart, and an extra strip of the front paper. I can tuck a gift card or some cash in the bottom pocket and have plenty of room to write a greeting. I think I’ll wrap it up in some plain craft paper and give it along with a cupcake. Because, who doesn’t love a cupcake on their birthday?
Well, I know this has been a longer post, so thank you for reading through. As always, a free instruction sheet is available right here. I hope you enjoyed the post, and please let me know if you made this card for someone you like! 😉
Till next time,
Be blessed
Barbara
Read about the free gift of salvation in Jesus that God gave to all, because He loves us.