Barbara Haropolous, Independent Stampin' Up! Demonstrator
Author: Barbara H
Welcome to Stampinopolous!
I'm glad you stopped by!
Follow my crafting and card making adventures. I'm an Independent Stampin Up! Demonstrator in the US.
I am no longer a Demonstrator with Stampin’ Up! I am continuing this website to share creative projects using many other products. Links in posts for Stampin’ Up! products I have used might be broken or possibly redirect you to their main page. I will also be closing my Stampinopolous Facebook and Instagram pages in April, 2025. Thank you for supporting me in all of these venues.
That sounds so official, lol. But, it’s the facts.
Life has been busy. Between my husband and myself, since May 2024 or so, we have had a few health issues, and I just sis not have the time or stamina to put effort into maintaining Demonstrator status with Stampin’ Up!
The GOOD NEWS, other than Jesus is Lord! is that my issues have settled down. I’ve been to every possible doctor since December that you can imagine, had scans, tests, bloodwork, etc, ad nauseum, and everything has come back CLEAR! I am now pursuing a Whole Food Plant Based mostly lifestyle, have dropped a few pounds and am working on that lipid panel to come down about 50 points in two key areas.
Other aspects of the “stepping back was a good thing” deal is that I am now free(er) to share my faith more in the aspect of creating projects; and I can now explore and chat about so many other fun products! 😉 Do you realize how many amazing paper crafting companies there are out there? SO. MANY!
So, be it Bible journaling, card making, folios (OH! I have a great one planned, posts and pictures coming soon!) and more, I’m so happy to share a love of creating with all of you. I also have two new socials, Rushing Wind Media, where I post on Instagram and Facebook. It’s my “old” publishing business that I have revived. You can look for me there as well.
Thanks for being patient and supportive as I revamp this site (the name will change to Rushing Wind Media at a future point) and get back to regular posting.
There are so many…SO MANY!…wonderful card creators out there online, and so many with You Tube channels. I mentioned a few in my last post about using card sketches, and my terrific team leader Lorraine just had a card featured as the inspiration for the August 2024 Oh So Inspired Hop which is hosted by (Call Me) Crafty Al. You can find so many great ideas to CASE (Copy And Selectively Edit or Copy And Share Everywhere). My Shadow Box Cards are inspired by Juli Baca of Sunny Day Stamping.
All stamped images and paper patterns copyright of Stampin’ Up!
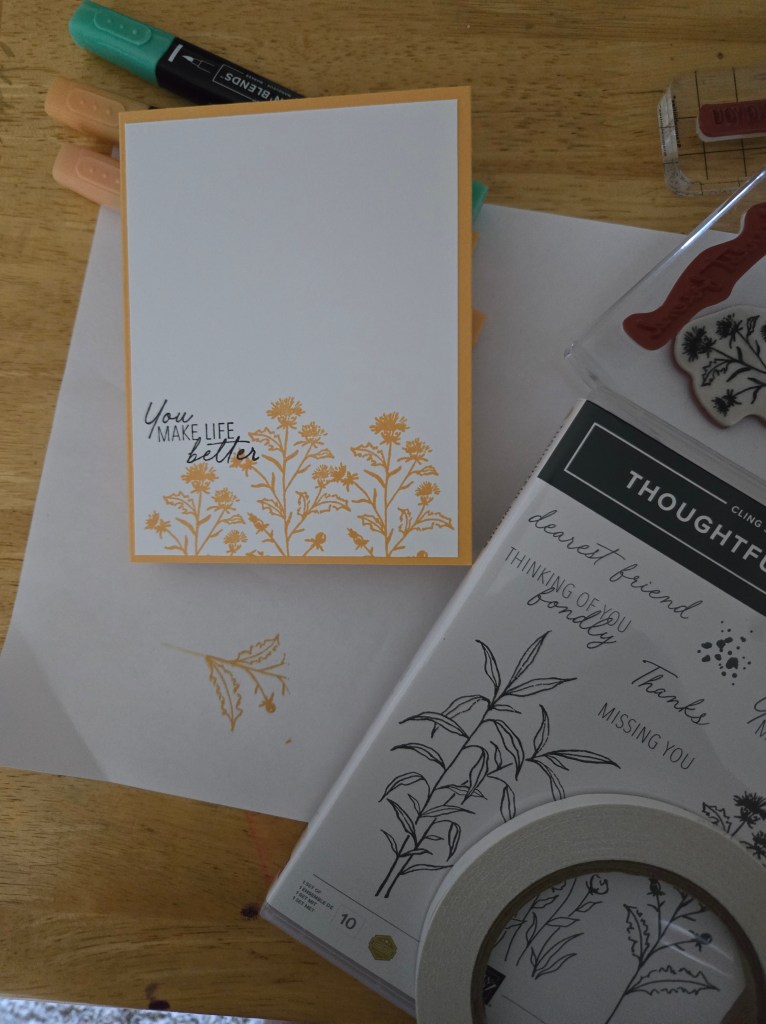
I made the Peach Pie one first, and since I am woefully bad at making boxes, it took me a bit of time to get my score lines all properly aligned (which has absolutely nothing to do with Juli’s excellent instruction sheet). I’ll list all products used at the end of the post. Die cutting the circles was a breeze, the square needed to be a tad more centered, and turning it to create the diamond, well, I should have gone down one size. But, card making is a creative process, and there are no accidents, just happy discoveries! I used Tear Tape to secure the edge of the box, as I wanted a good hold. If you use the Tear Tape, be sure to align it well before you press it. You write your message on the back of the card, and it’s probably a good idea to write your message before you attach the back. Again, crafting is an adventure, lol.
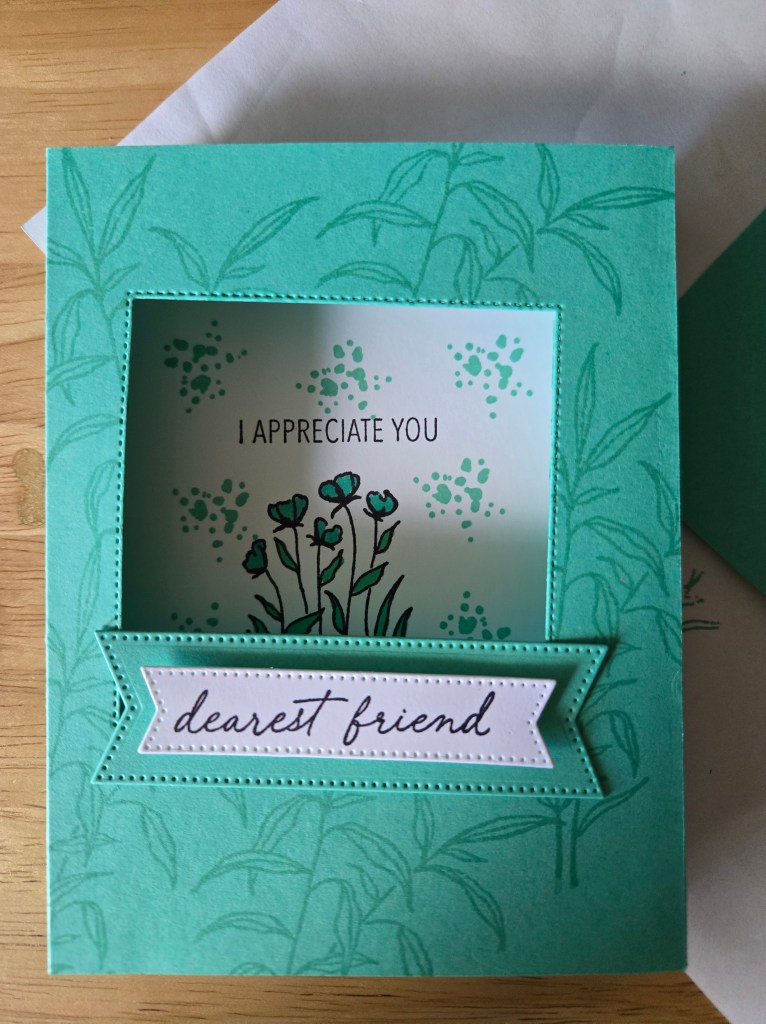
I made the Summer Splash one next, and I did much better with the scoring and folding alignment. I feel that this is a great card to make using the Simply Score Board. I used my Trimmer, which has both a cutting and scoring blade. Ah, the shopping list certainly is never ending. 😉
I went back to the circle die cut, and I have been waiting for an opportunity to use this particular designer series paper. This shadow box technique was perfect! I love the soft colors and it makes an elegant card. Crooked was kind of my thing for the day, hahaha! And, I will say right here that I am not usually a fan of wasting expensive designer paper on an envelope, but these cards seemed to override me.
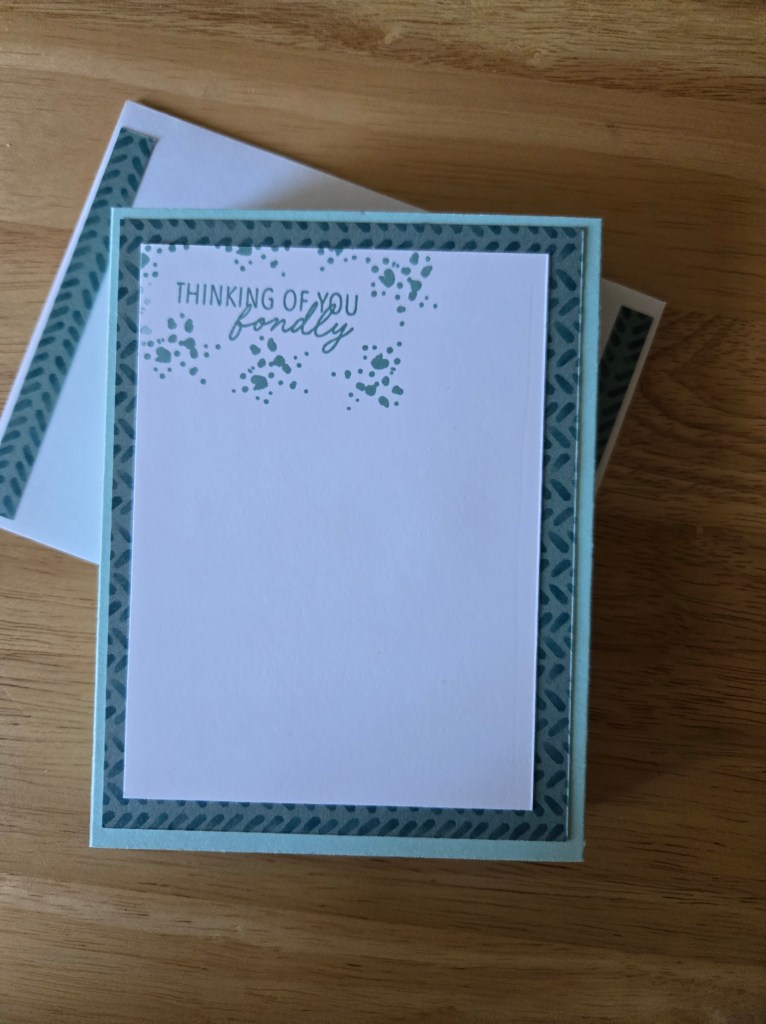
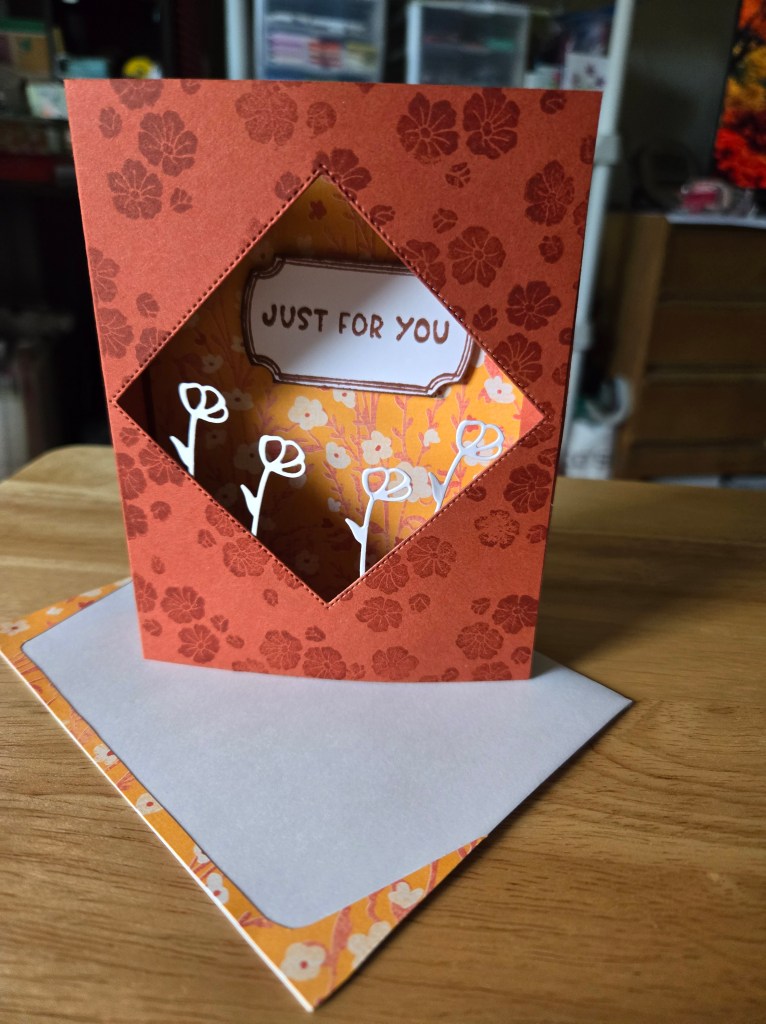
The last one is where I tried out the diamond shape. I will give it another go with the smaller die, because, who doesn’t love a diamond? These are also colors that I don’t often gravitate to, and I really liked the effect of the coordinating colors! On this card front I stamped with Versa Mark ink to get that tone-on-tone look, and I thought the punched image showing some of the paper on the back was a fun touch. I also got a bit creative and used the scrap that was left from the envelope flap to decorate the front of the envelope.
All in all, I had a fun afternoon creating these shadow box cards. They fit in an US A2 size envelope (4 1/4 in. x 5 1/2 in.), and I would suggest using the non-machinable stamps. They are a bit more expensive at $1.19 each, but your card will arrive in good condition.
I hope you enjoyed seeing these Shadow Box Card creations! Thanks for stopping by! I’m hoping to get back to You Tube in September, so keep an eye out!
God Bless, Barb
Barbara Haropolous, Independent US Stampin’ Up Demonstrator
I’d like to share about card sketches today. Why? Because, this seems to have exploded online in the last month! Call them what you will (patterns, designs, templates, recipes) but this seems to be the latest buzz in the card making realm. In fact, the new 2024-2025 Stampin Up! catalog has 20 card sketches throughout the pages, and all of them are showcased along the bottom of page 22. Drop me a comment if you’d like a paper catalog, or see the right sidebar for a digital version.
What is a card sketch? It’s simply the pattern you will use to create a card. You can find them on Pinterest (look for me while you’re there!), on You Tube, the sources are endless! My wonderful Team Leader, Lorriane Cich has some great videos using her simple and elegant sketches; check her latest on using Designer Series Paper squares. I have printed numerous instruction sheets from many of the people I watch, and I have Julie Bolhuis’s book with 54 fun fold templates.
Essentially, you follow the directions! It’s like following a sewing pattern or a cake recipe. Gather your ingredients, measure them, and add them in the correct order. A sketch typically doesn’t have directions to go with it, so it’s a “use your imagination” type recipe rather than specific ingredients. You don’t have to use a specific color card stock or the exact circle die. You can pick and choose from among your stash of great supplies! Is it fun to get “all the things”? Of course it is! But, the point of using a sketch, with no specific products attached to it, is for you to use the products and supplies you already have. I bet many of you have an entire shelf of stamp sets, card stocks and ink pads. Dig in and find ones that you haven’t used in a while, and CASE a sketch! (Copy And Selectively Edit)
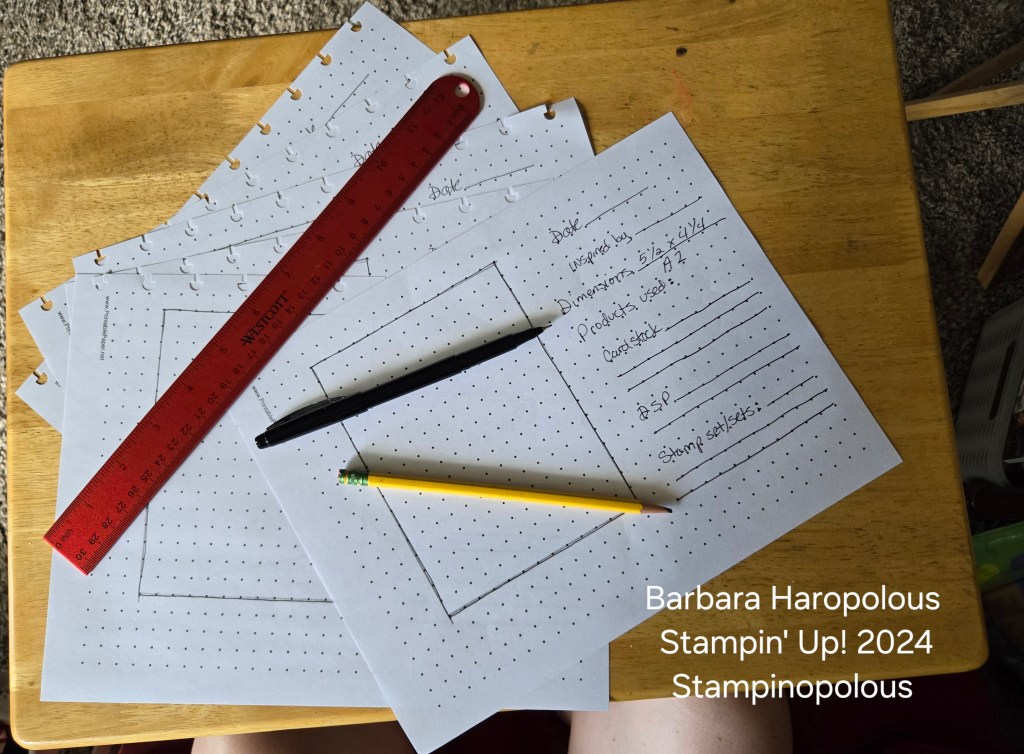
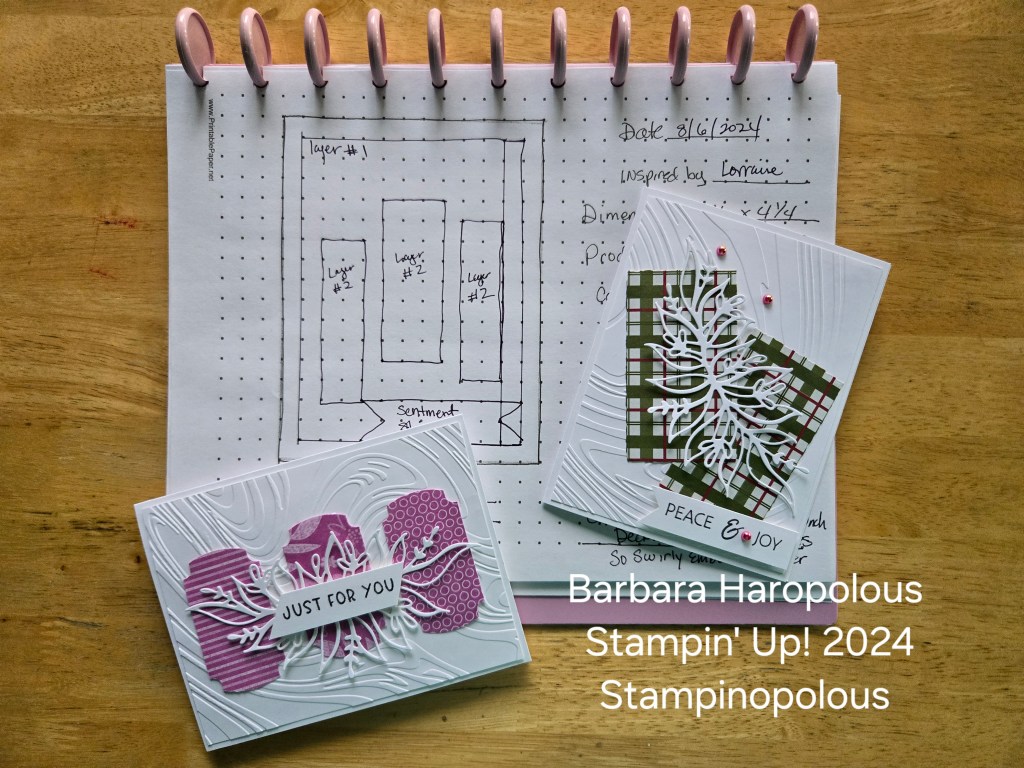
To show you just how simple this can be, I will share what I am working on creating to keep my card ideas and ones I’ve made. It’s simple dot grid notebook paper that I printed from Printable Paper. I like the dot grid because I can make nice, straight lines or other shapes and get them pretty good on scale. I’m sure there’s a way to do this digitally as well, but I just like the feel of plain old pencils and paper. 🙂
I used the left side to sketch out the card base. To the right, I have a place for the date, who I CASE’d it from or is it my own idea, the dimensions, card stock and Designer Series Paper used, stamp set and any other pertinent info. I did realize after I copied my template and punched it for my disc binder, that I forgot to make a spot for inks used! *facepalm* But, there’s plenty of room on the back of the sketch for other comments and instructions, so…yeah, let’s go with that! Then you simply sketch out your design pattern.
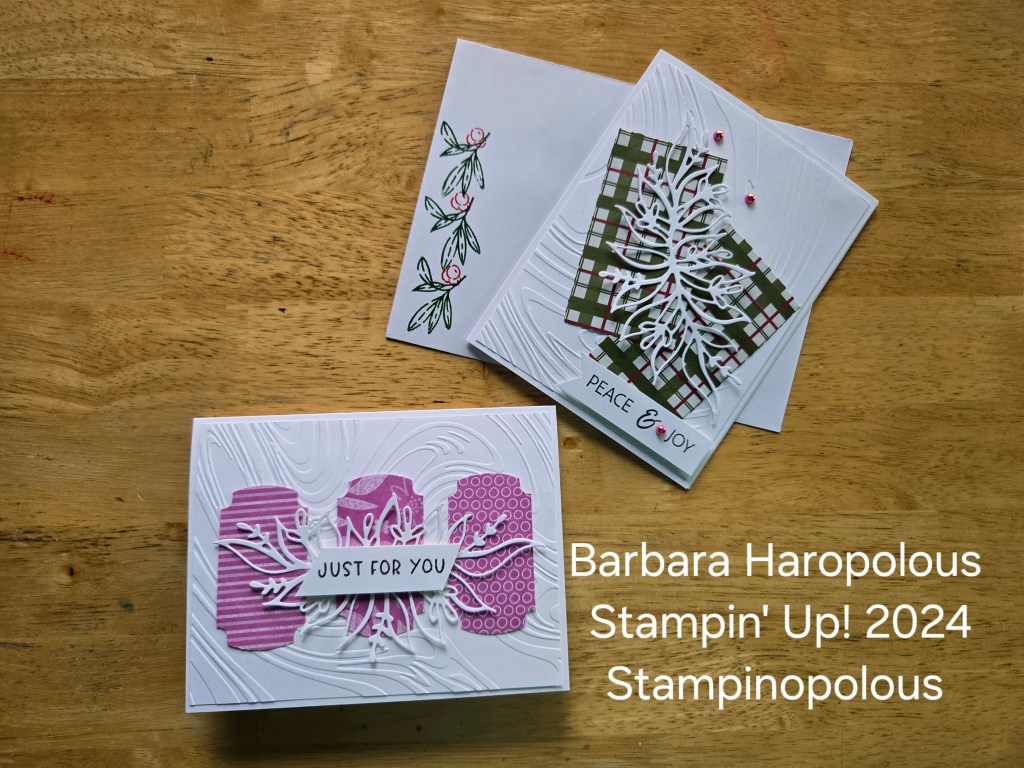
In my example, I’m using my team leader Lorraine’s latest team challenge. It featured an A2 size card (5.5 in x 4.25 in), an embossed layer, 3 rectangles and a sentiment strip.
I created 2 cards using this sketch; a vertical Christmas card and a horizontal anniversary card for my hubby (we celebrated 41 years on Tuesday!) I used the ideas and modified to my supplies and needs. I added a bit of bling to them as well, but this is a simple and easy pattern to follow without any extras. On the Christmas card, I only used two of the three rectangles. Another modification that is easy to make once you have the basic idea. I have the template tucked into the back of my binder so I can print more when needed. And, don’t forget: no naked envelopes! 😉
There are several sources for free PDF’s to keep a card sketch list. Search on Pinterest or Google for “card making supply list.” You can also purchase a Creative Companion, which is a collab between Trinity Stamps and Mary Gunn of Craft Roulette. I highly recommend you watch an episode or 6 of Craft Roulette. It’s fun and informative and you’ll have more card ideas than you can make!
I hope this has helped you in your card making and crafting endeavors! Do you keep a sketch/pattern book of your creations? Let me know in the comments!
Thanks for popping in! See you next time, and blessings to you!
Barb
Barbara Haropolous, Independent Stampin’ Up! Demonstrator, USA
As I study through the book of Hosea with my small group, it has been a constant reminder that we, here in 2024, are really no different from Israel in 700 B.C. Our idols might present themselves differently, but they are still idols that keep our eyes off of God and onto ourselves. This study has also been mirroring much of what I’m reading in the devotional book by Paul David Tripp, New Morning Mercies.
This particular phrase caught our collective attention this past week: “Ephraim is like a dove, silly and without sense…” (Hosea 7:11a). At first glance you must wonder what this reference means. Scripture refers to the Holy Spirit coming as a dove on Jesus after His baptism (John 1:32). It also admonishes believers to be gentle/innocent as doves (Matthew 10:16).
When you look into the behavior of doves, a new understanding opens up. They are social, but they get easily lost. They flap around aimlessly, looking for places to perch. They know where to find the places the other doves are hanging around, but they seem unsure if they want to stay.
Hosea is likening the behavior of Israel to doves. They want to be with the other Israelites, but they get easily lost in the world and all it’s attractions. Although they have a fine homeland, given to them by God, they don’t seem to want to perch there. They have His word, written on their hearts, but other things keep taking precedence. They know where to go for socializing (The Temple courts) but, gee, that mountain over yonder, with all that other stuff happening, it looks kind of appealing.
We, as believers, know where to hang around (church and church functions), we know what to base our life on (The Bible) and that this world is not our home and we should fix our eyes on heaven (2 Corinthians 5:1, Hebrews 12:1-2). But we have the problem of self, of sin, of wanting what we don’t need and shouldn’t look for.
As Tripp says in the devotional, we have Jesus, and the amazing grace that God pours out on us. Will we still stumble? On this side of eternity, yes. But, God…God and His mercy restores us again and again, and rescues us from the idol of “self.”
Don’t flap around like a silly dove; get grounded in GRACE and His word daily. Run back to Him when you stumble or fall and soak in some of that mercy before you get back on your feet to move forward again.
And my God will supply every need of yours according to his riches in glory in Christ Jesus. To our God and Father be glory forever and ever. Amen. Philippians 4:19-20, ESV
*Anything written in this post from here on out is my express opinion and nothing more. No one offered me compensation in any way, shape or form.The only LINKS that are my affiliates: the Memento Tuxedo Black ink and the Unbounded Love stamp set.
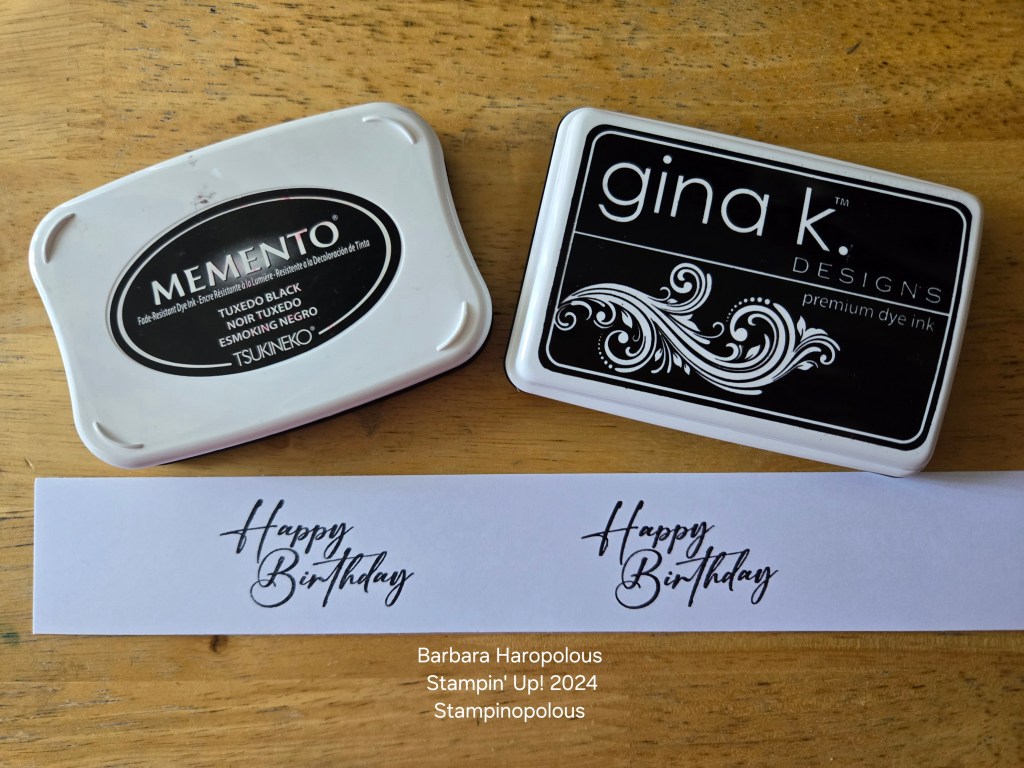
Black ink is very important for any stamping. You need a crisp outline for coloring that won’t bleed, and you want very clear sentiments. I have used Stampin’ Up! brand inks, Distress Ink and Gina K Designs ink.
To be very honest, I’m disappointed that Stampin’ Up! Doesn’t offer black ink. I love their inks and their trademark pads. However, for black, they carry Memento Tuxedo Black, which is widely available in craft stores and online. I have never liked this ink as much as the Stampin’ Up! brand inks, and I find myself constantly having to reink it (good think I got the reinker!). I don’t know if that has anything to do with living in the Denver, CO area (super dry!) or not. Please comment if you think that’s a possibility!
Editing to add: I mainly use Stampin’ Up! Pebbled Path for my “black” outlines and sentiments. It’s a nice, deep gray and I like the look of it.
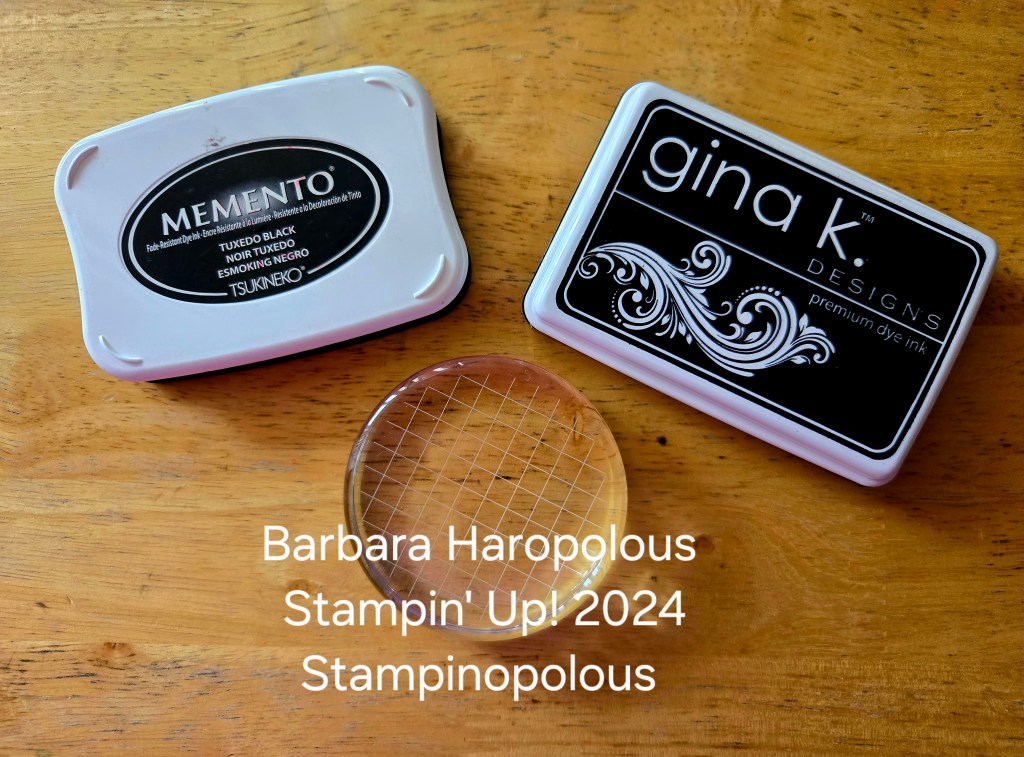
I’ve been intrigued lately by Gina K Design’s videos. She has her own line of inks, so I tossed caution to the wind and ordered her Onyx Black ink pad and a cool, round stamp block.
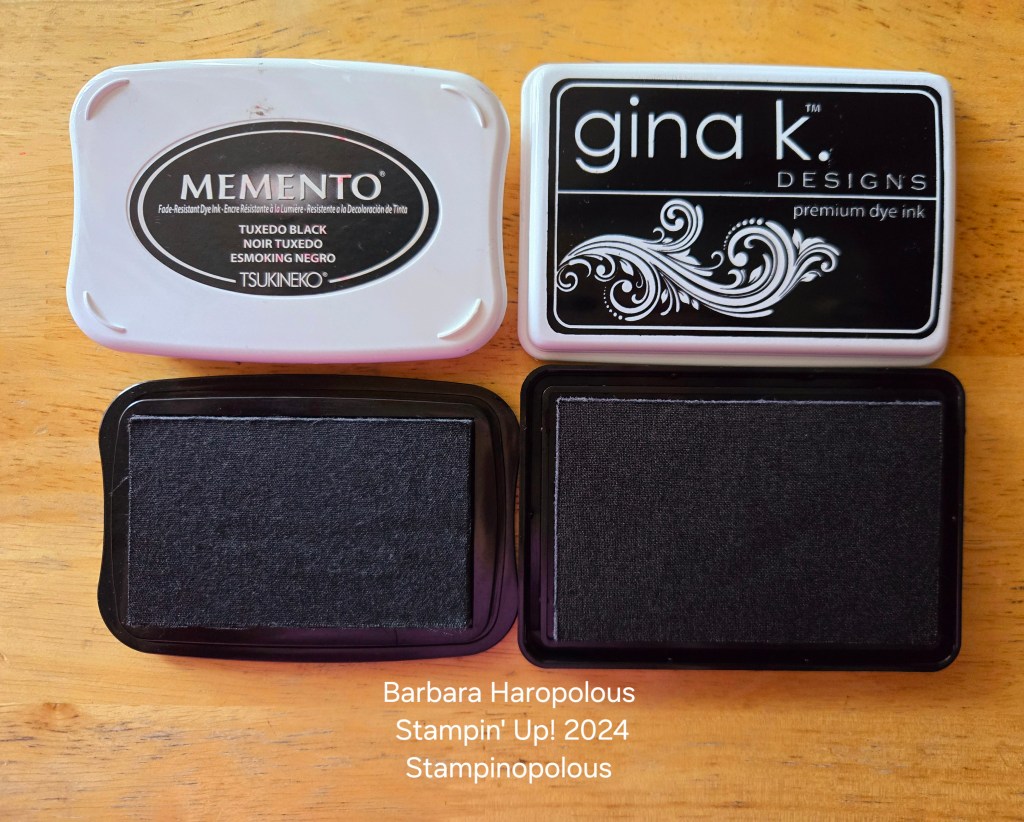
Here’s the side-by-side, which I took with my Samsung Galaxy S24, natural lighting:
Cases are both easy to open. As you can see, the cases are about the same size, but the Gina K ink pad surface is larger. It’s a full half inch loner and a quarter inch taller. The thickness is the same (about 1/4 inch).
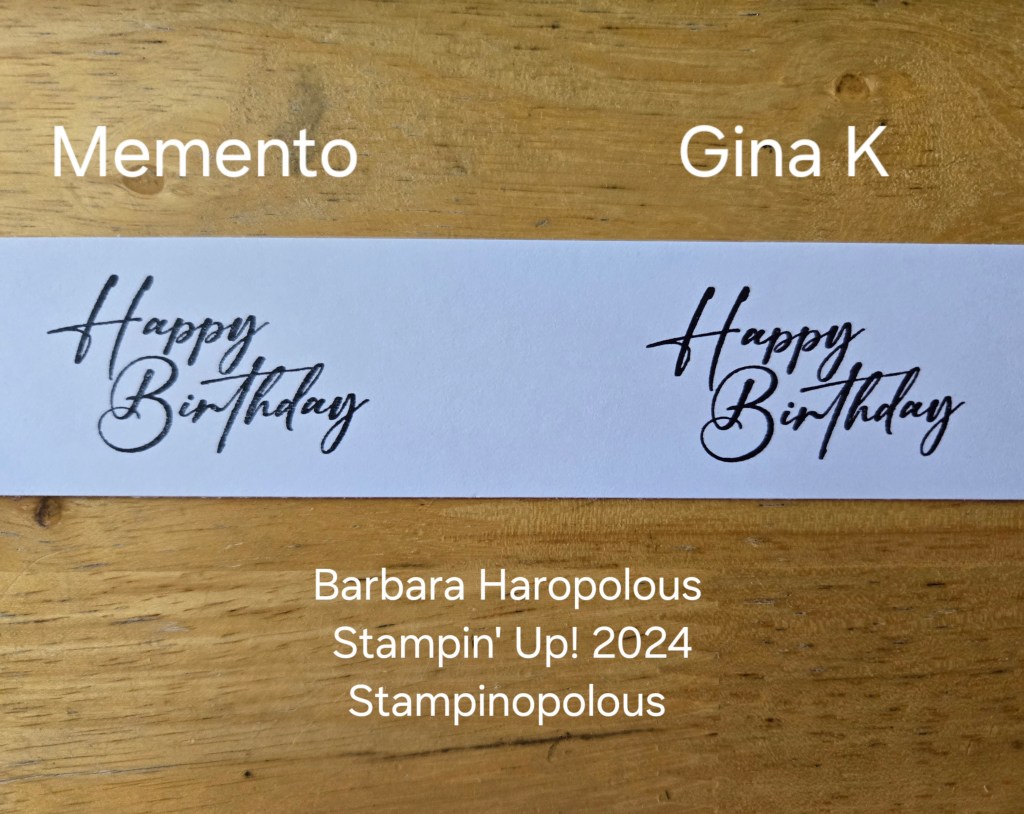
I used a simple Happy Birthday sentiment from the Unbounded Love set, stamped on Stampin’ Up! Basic White card stock. The Memento Tuxedo Black needs a second stamping; the image just doesn’t have the oomph I want with a single stamp. I don’t always want to break out the stamp positioning tool for a simple sentiment and multiple stampings. The Gina K Black Onyx has a wonderful, deep black color with only one stamping. The image is clear and really stands out.
What I loved:
The ink is great! My outlines and sentiments are all crisp and clear, and all in one application
Cost: at $7.99 for the ink pad
Dries fast!
Can be used for all techniques
Refill available, $5.99
What I would like better:
If it had a foam pad
If the pad was a bit bigger, but it is bigger than the Memento
If it had a nifty all-in-one case
None of those “better” things, however, are deal breakers. I much prefer the Gina K Designs Black Onyx ink over the Memento Tuxedo Black. The Gina K will be my absolute go-to black in for the foreseeable future.
What is your favored black ink? Is there another one I should try out? let me know in the comment section!
Next product comparison: that groovy round stamp block 😉
Thanks for popping in, and, as always. blessings to you! Barb
Barbara Haropolous, Independent Stampin’ Up! Demonstrator, USA
Well, my friends it has been some time! Thanks for hanging around, checking on the blog and Facebook/Instagram/You Tube for me.
Our summer has been taken up by medical appointments; my hubby has ongoing cancer checks and I finally, after a full year, have gotten into physical therapy! It will be a year on Friday that I had my left hip replacement done. And, next Tuesday we celebrity #41defulyearstogether! Yes, if you’re my friend/follower on any of my personal or Stampin’ socials, you’ll see that hashtag all month 🙂
As a result of all this activity, I have not been creating cards save for my Christmas in July class that I held last week. I need to catch up! I will post again regularly beginning next week (Aug 7 for In the Word and Aug 8 for Crafty Thursday). We have a few more appointments to hurdle through. I appreciate prayer for us.
Please check back, keep an eye on the socials, and most of all, God’s richest blessings to you all!
Goodness, the month has gotten away from me! Lots of “life” has been going on, and unfortunately has pushed the pleasures of creating aside.
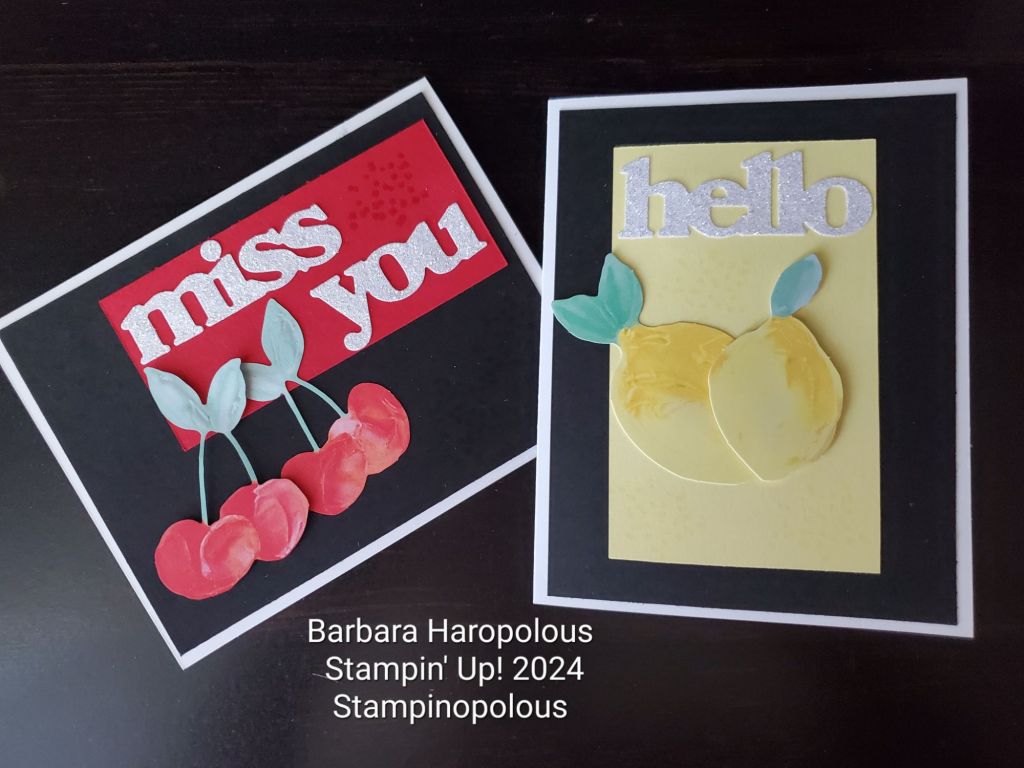
But! I made a few quick cards using some of the June Paper Pumpkin kit, which is called Life is Sweet. The kit has scads of fun ephemera pieces and I only scratched the surface on these three alternatives. My terrific team leader, Lorraine Cich, did a great unboxing video that you can see here.
I created these using a Basic White card base, a Basic Black layer, then the sentiments and ephemera came from the kit. I used an envelope flap to make the peach basket, and ran it through an embossing folder for texture. The card stock behind the sentiments is Lemon Lolly and Real Red. All other elements are in the June kit.
I hope to get back to a regular posting and video schedule in July. Keep your eyes on the blog, and other social for more!
Today we celebrate the men in our lives; our own fathers, our husband’s, uncles, anyone who stood in as the father figure.
I like to recall the great times I was blessed to have with my father, my Uncle Jim, celebrating my hubby with my kids. Now, two of my sons are fathers, and it’s an honor to see them grow into their roles and raising my amazing grandies.
My hubby is a wonderful father, my best friend and we’ve been blessed with 41-derful years.
He’s not much for sweets, usually. I decided to snazzy up a favorite, and I’m happy to share the recipe with you!
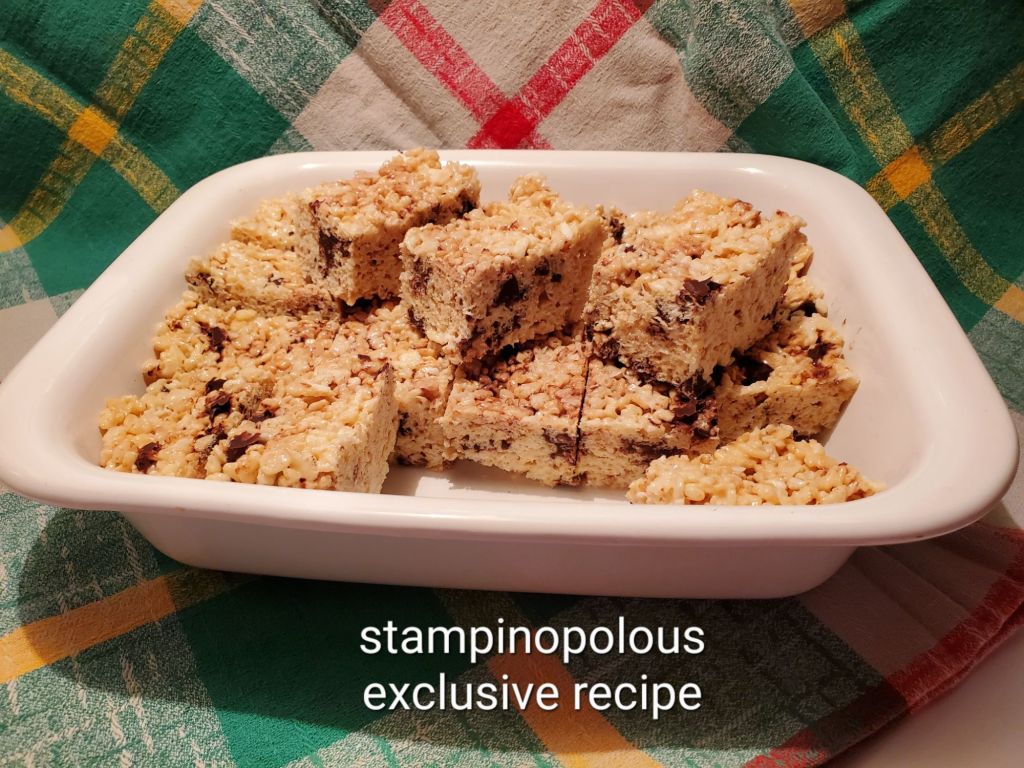
Coconut and Chocolate Chip Rice Krispie Treats
1 stick butter
1 bag mini marshmallows
1 cup semi sweet chocolate chips
1 cup coconut flakes
1 teaspoon vanilla
1 box of Rice Krispies, less 2 cups
Melt the butter, then add marshmallows, stirring till almost liquid. Remove from heat and add vanilla, mixing in well. Add coconut, mix in, then add the cereal. Stir, stir, stir till combined, them add the chocolate chips. Mix well. Pour into a 9 in x 13 in baking dish lined with wax paper or parchment paper. Using another piece of wax/parchment paper, press it down and even out. Place in fridge at least an hour before serving. Cut into squares or rectangles. Enjoy!!
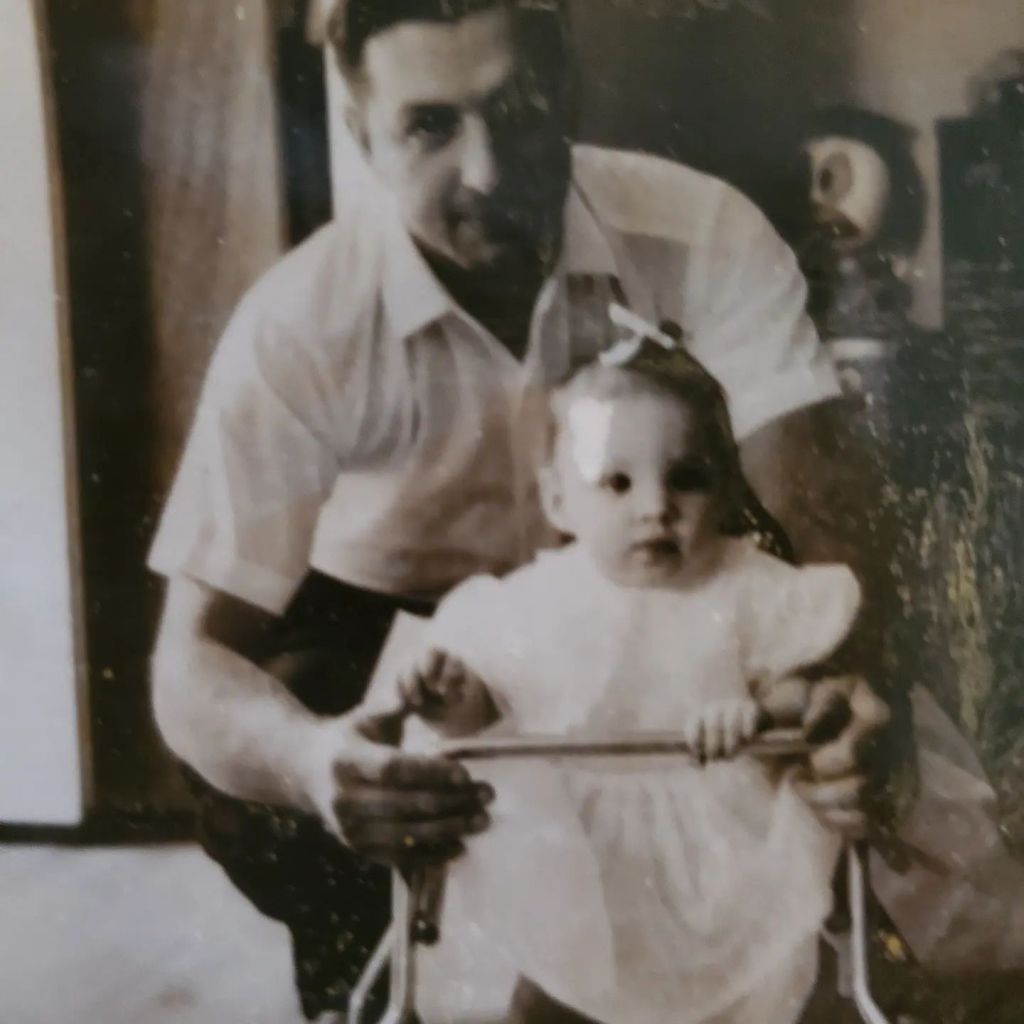
Most of my family, 2024; my Dad and I, circa 1963
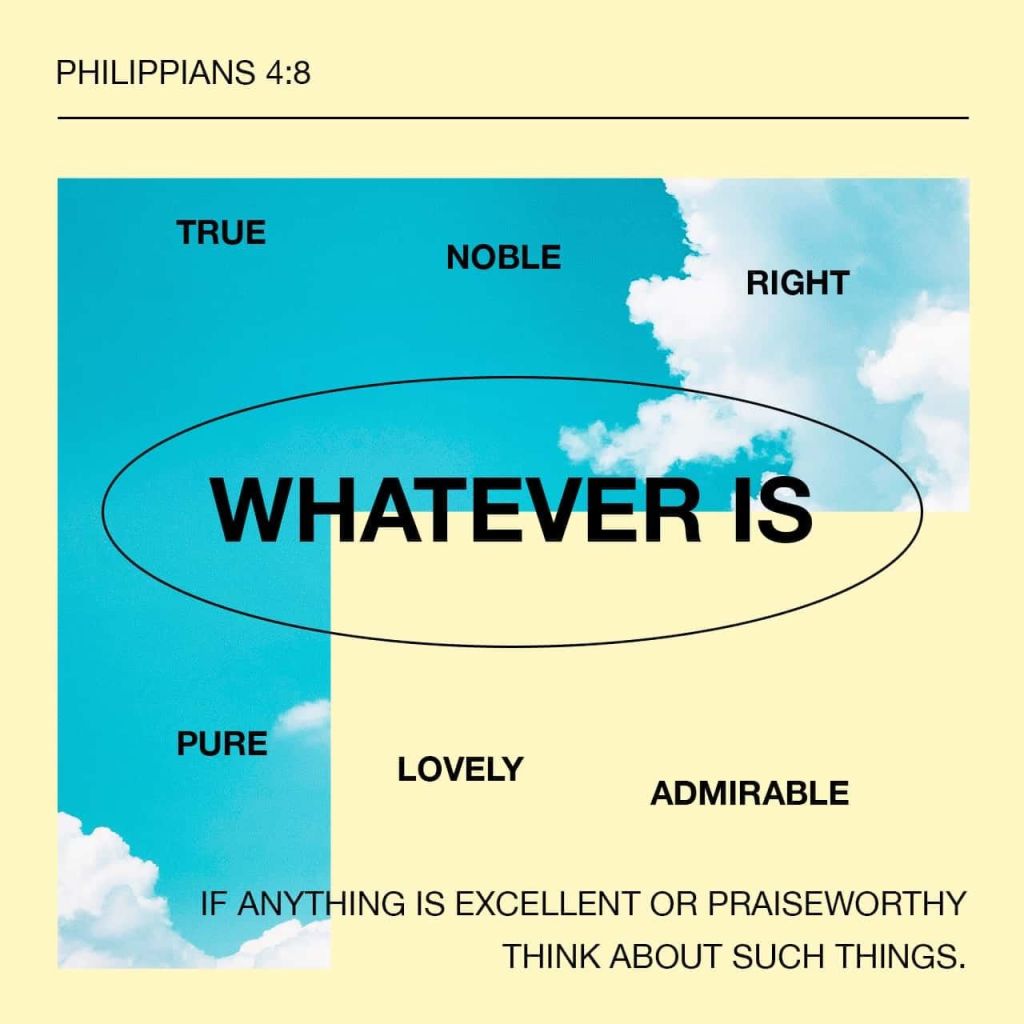
I know these man made holidays can be painful. Many did not have a father they could rely on, for many reasons. There has been a lot of trauma in my life as well. But, as the Bible says, I try to keep my focus on whatever is true, lovely, noble, honorable. I hope you know that your Heavenly Father will never let you down. He is always watching, always listening, always merciful when we come humbly before Him.
Have a wonderful day, whomever you are celebrating 🧡